Managing Bookings
Bookings are the heart of Knotless. This guide covers everything you need to know about managing your bookings effectively.
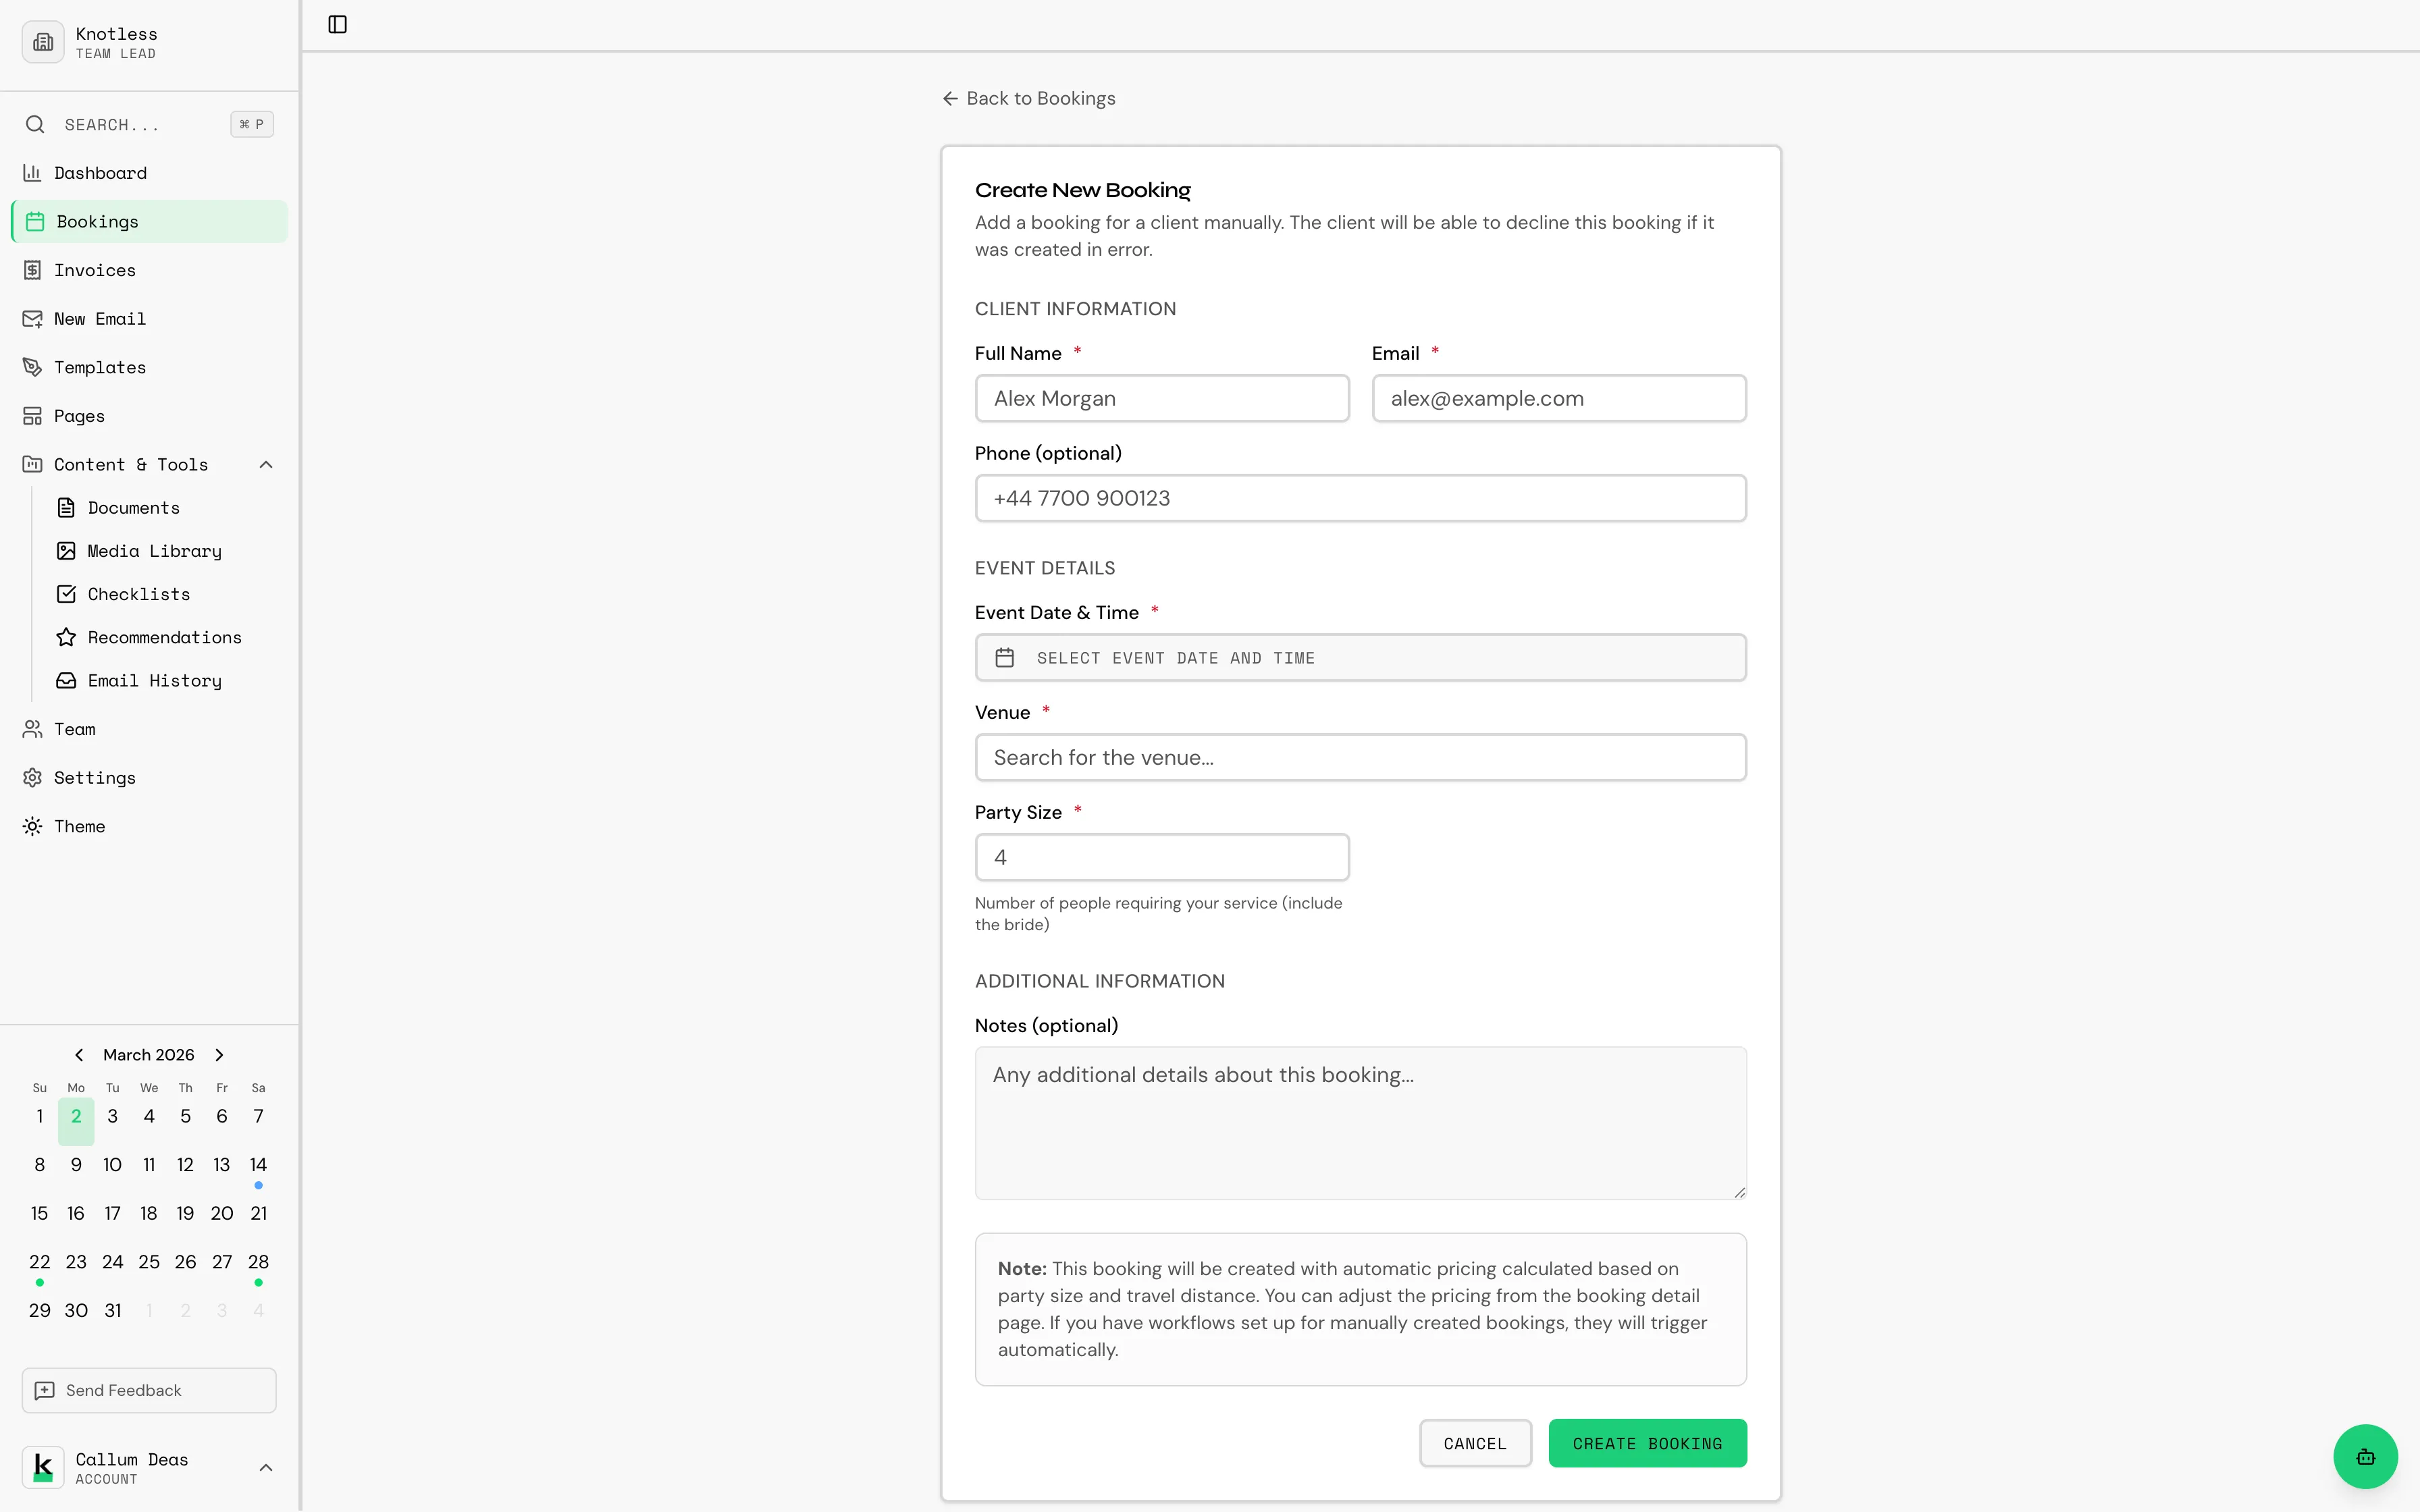
Creating a New Booking
Section titled “Creating a New Booking”To create a new booking:
- Click Bookings in the sidebar
- Click the New Booking button
- Fill in the booking details:
- Client name and contact information (email, phone)
- Event date and time
- Venue with Google Places autocomplete for address lookup
- Party size
- Notes
- Click Save to create the booking
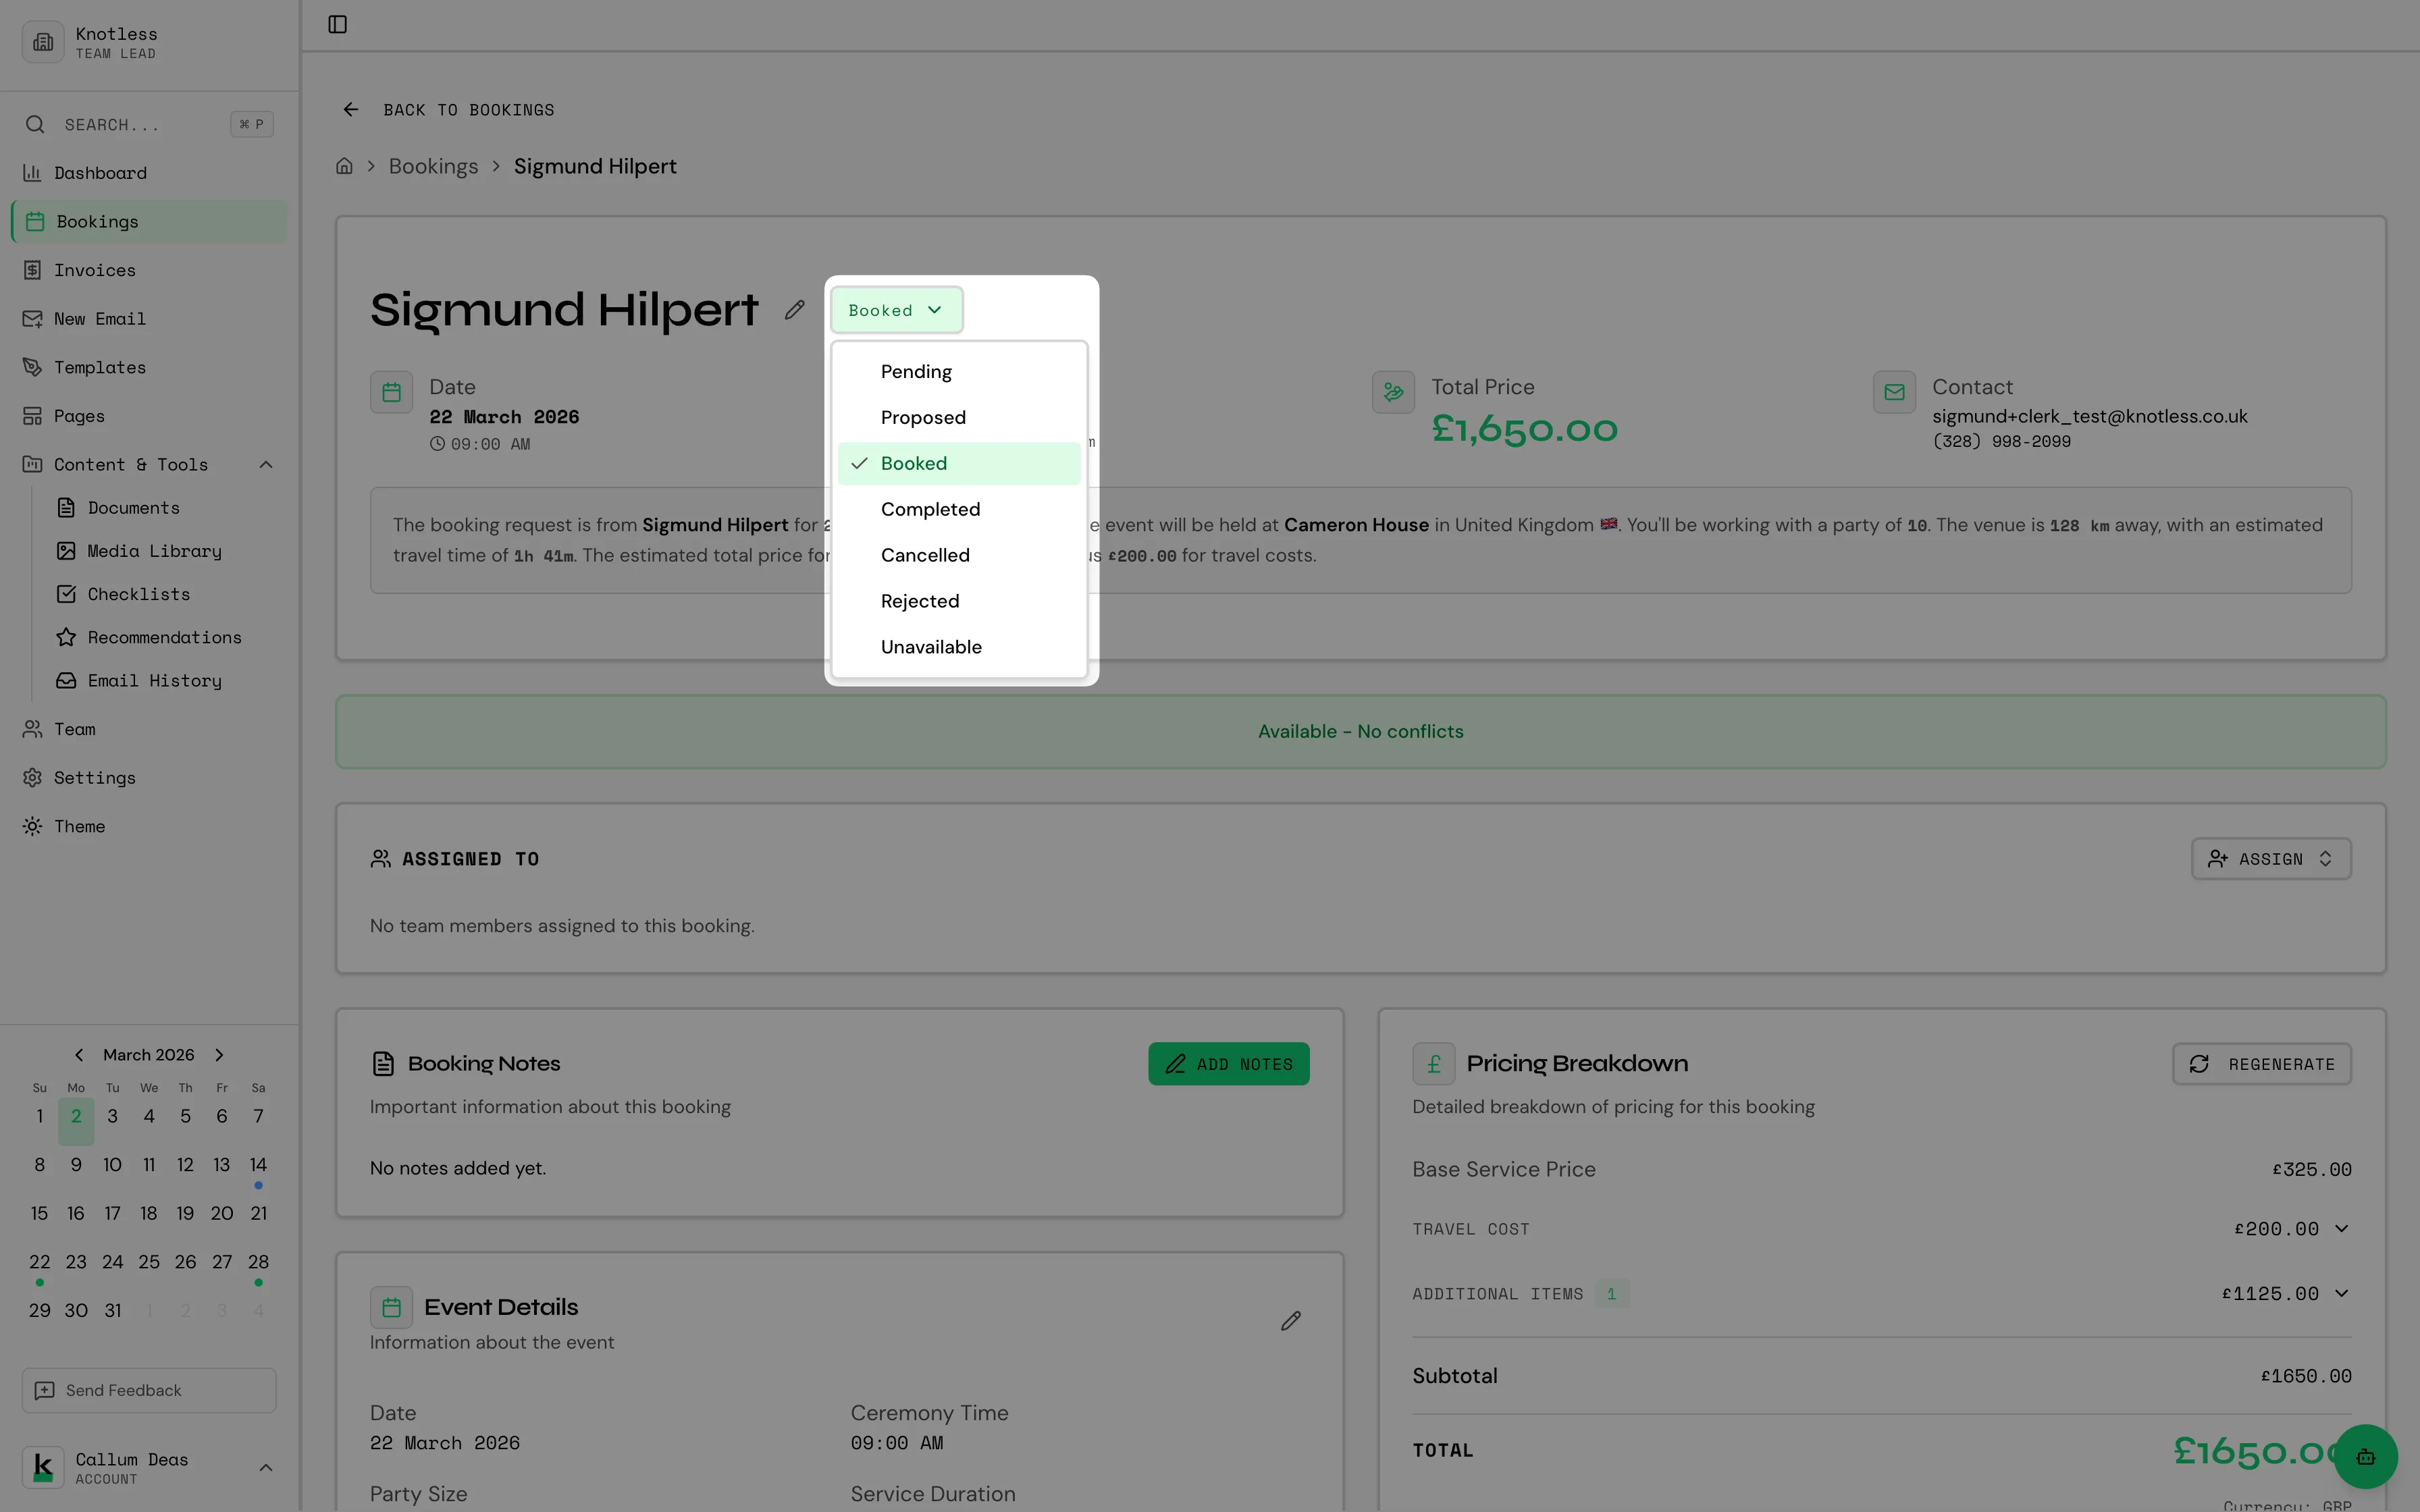
Booking Status
Section titled “Booking Status”Each booking has a status that helps you track its progress:
| Status | Description |
|---|---|
| Inquiry | Initial contact, not yet confirmed |
| Proposal Sent | You’ve sent a proposal to the client |
| Confirmed | Client has confirmed the booking |
| Deposit Paid | Deposit has been received |
| Completed | Event has been completed |
| Cancelled | Booking was cancelled |
To change a booking’s status:
- Open the booking details
- Click on the status dropdown
- Select the new status
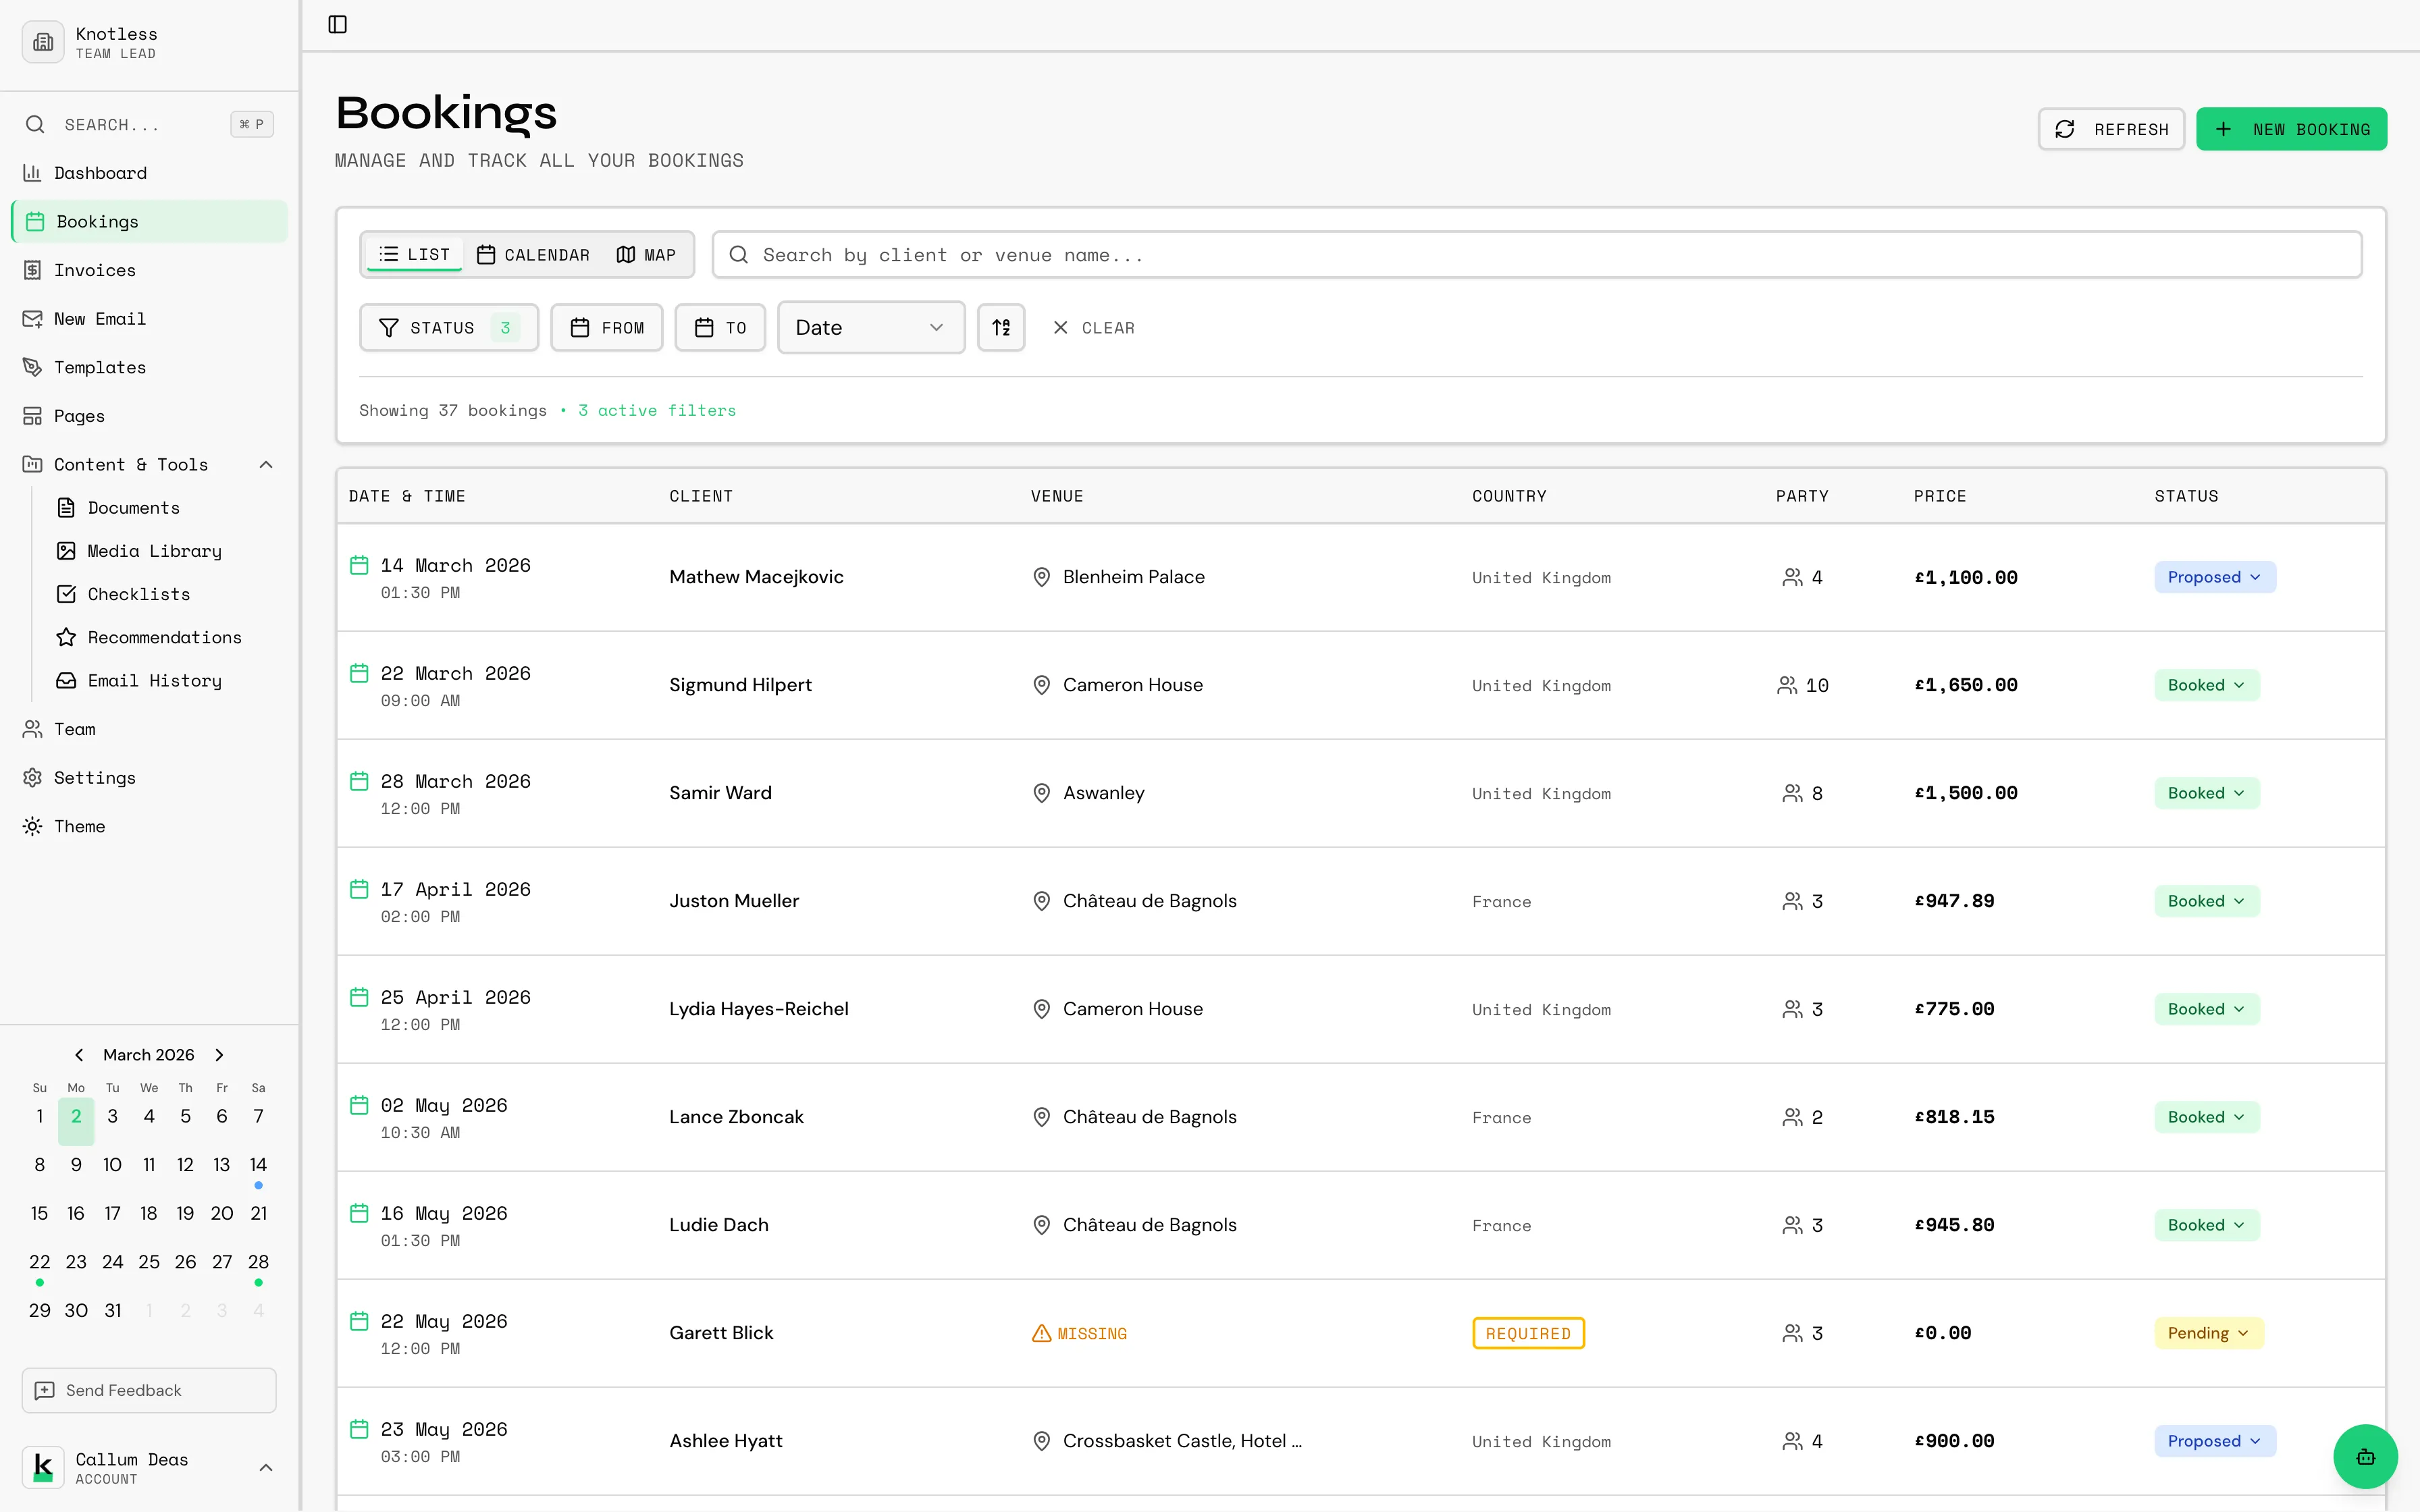
View Modes
Section titled “View Modes”The bookings page offers three different ways to view your bookings:
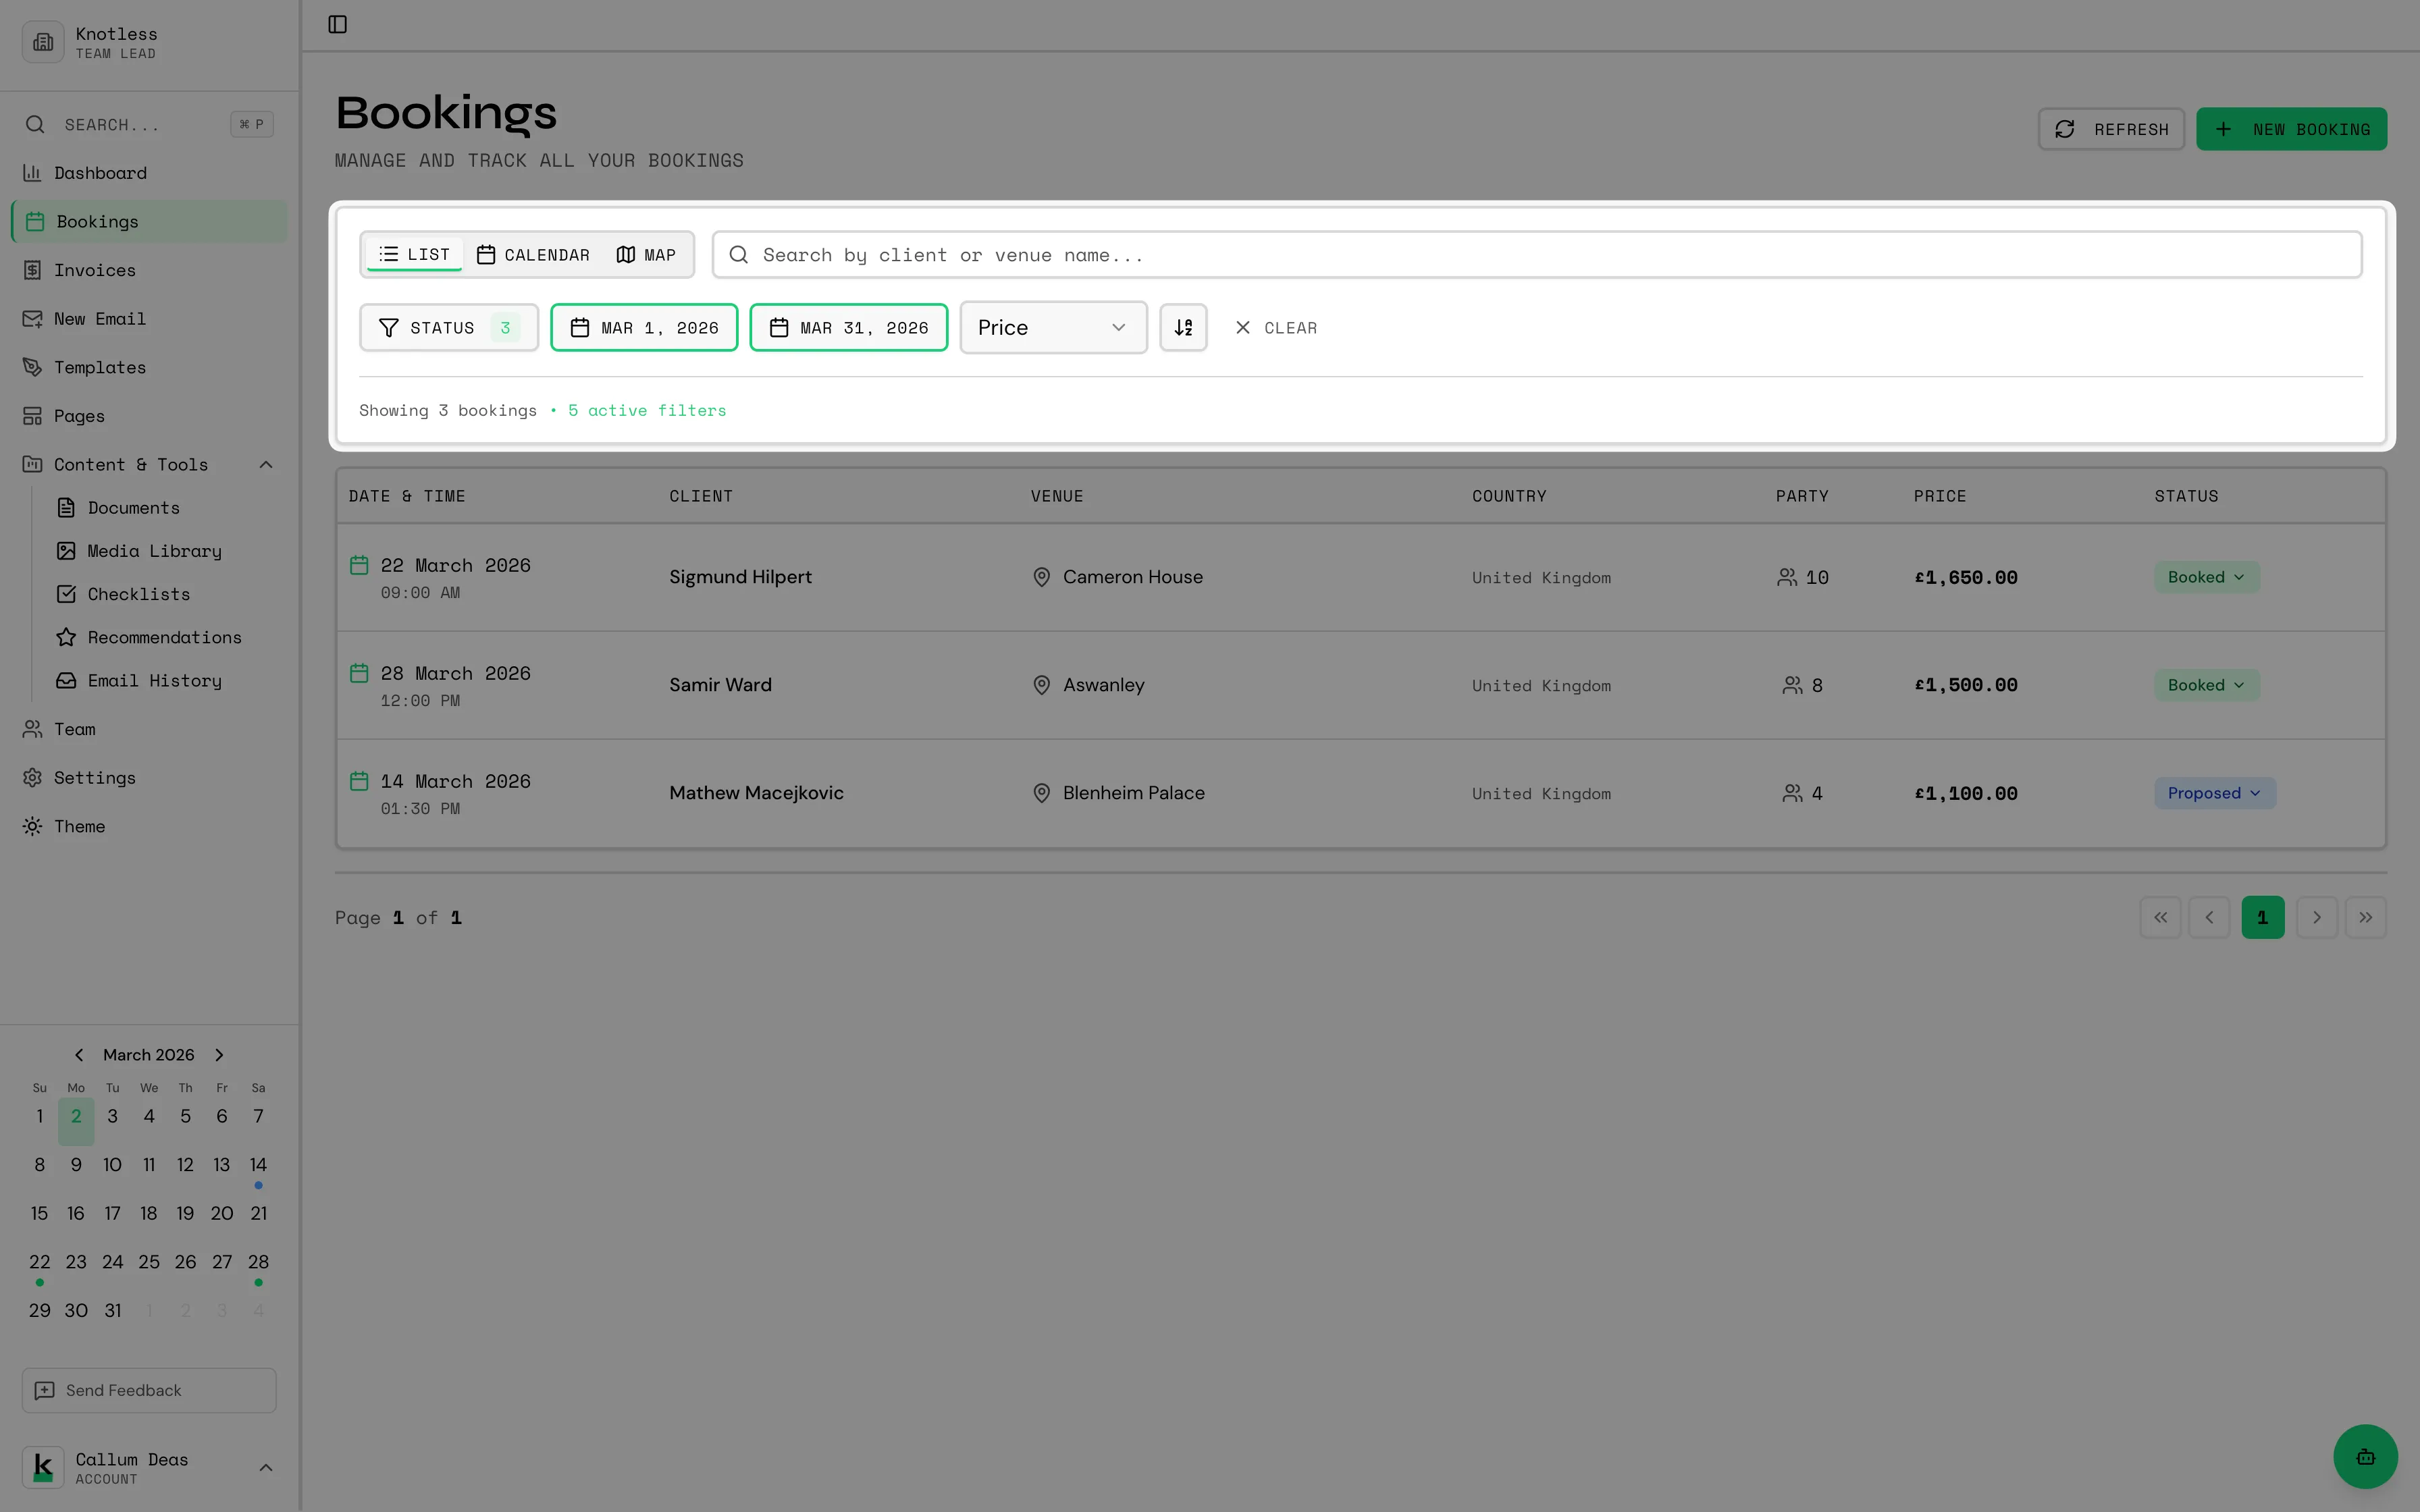
List View
Section titled “List View”The default view showing all bookings in a paginated table with status badges, client names, dates, and venues. Results are paginated with 10 bookings per page.
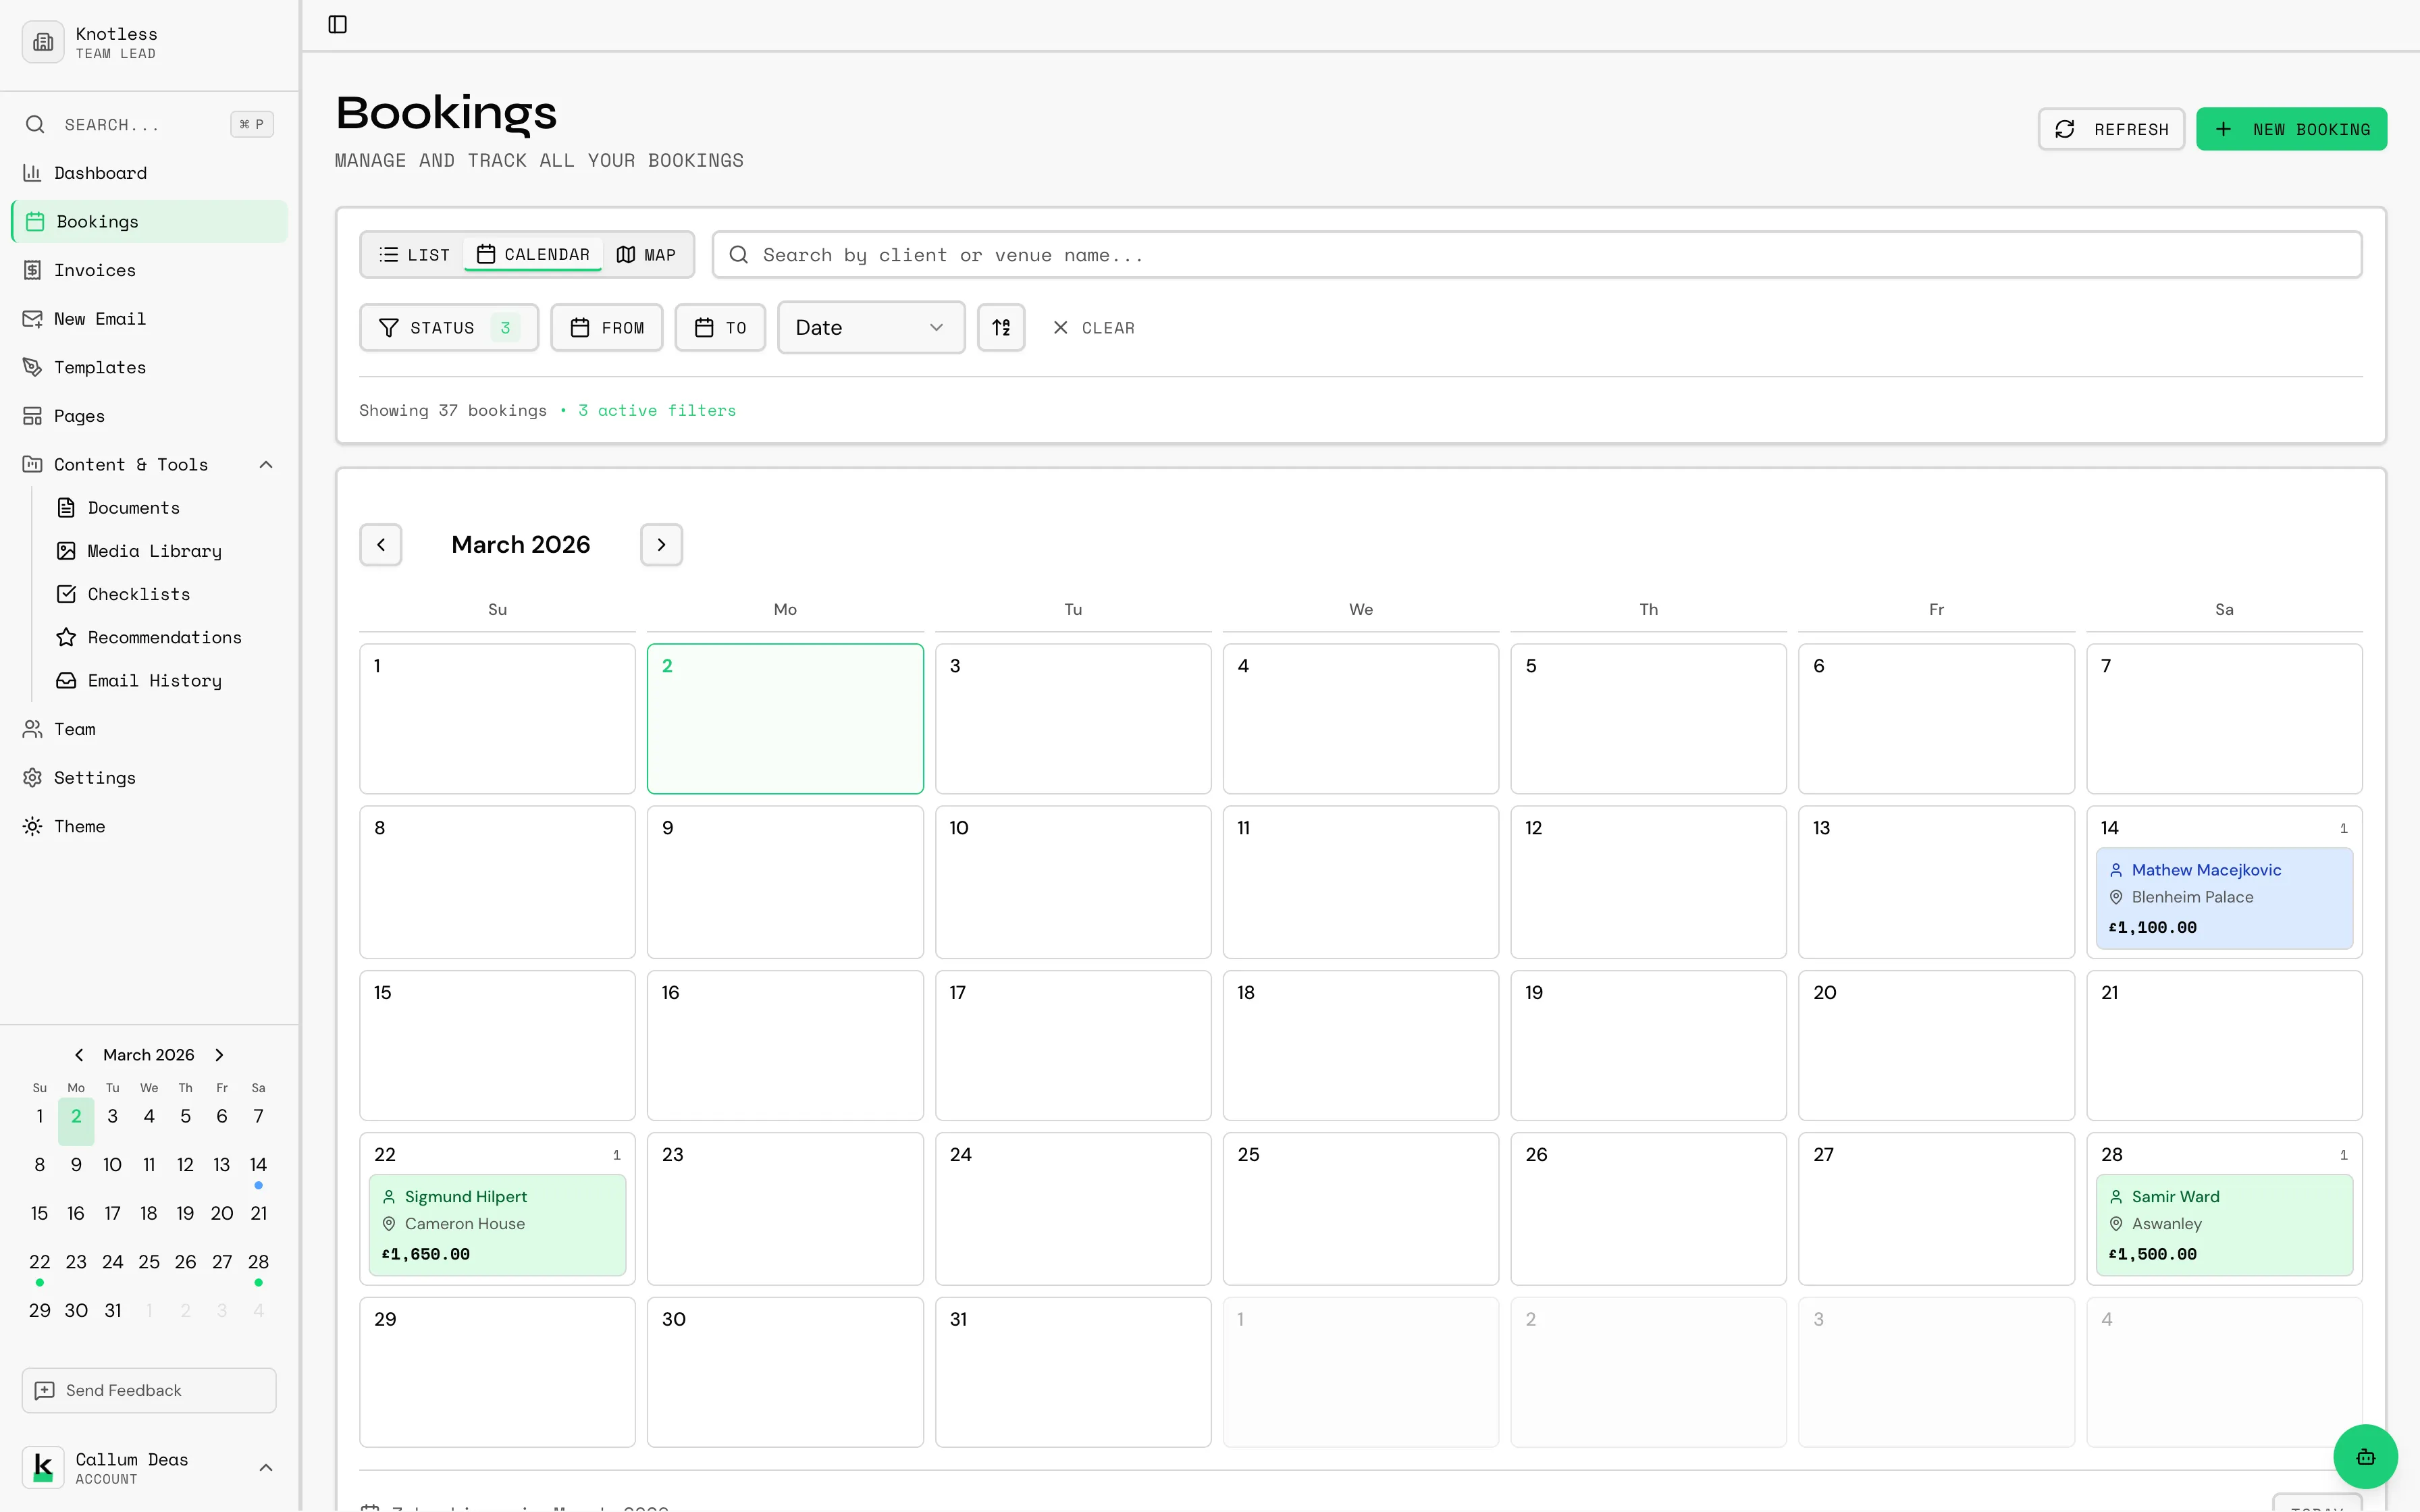
Calendar View
Section titled “Calendar View”See your bookings visually on a monthly calendar. Navigate between months using the arrow buttons and click any booking to view its details.
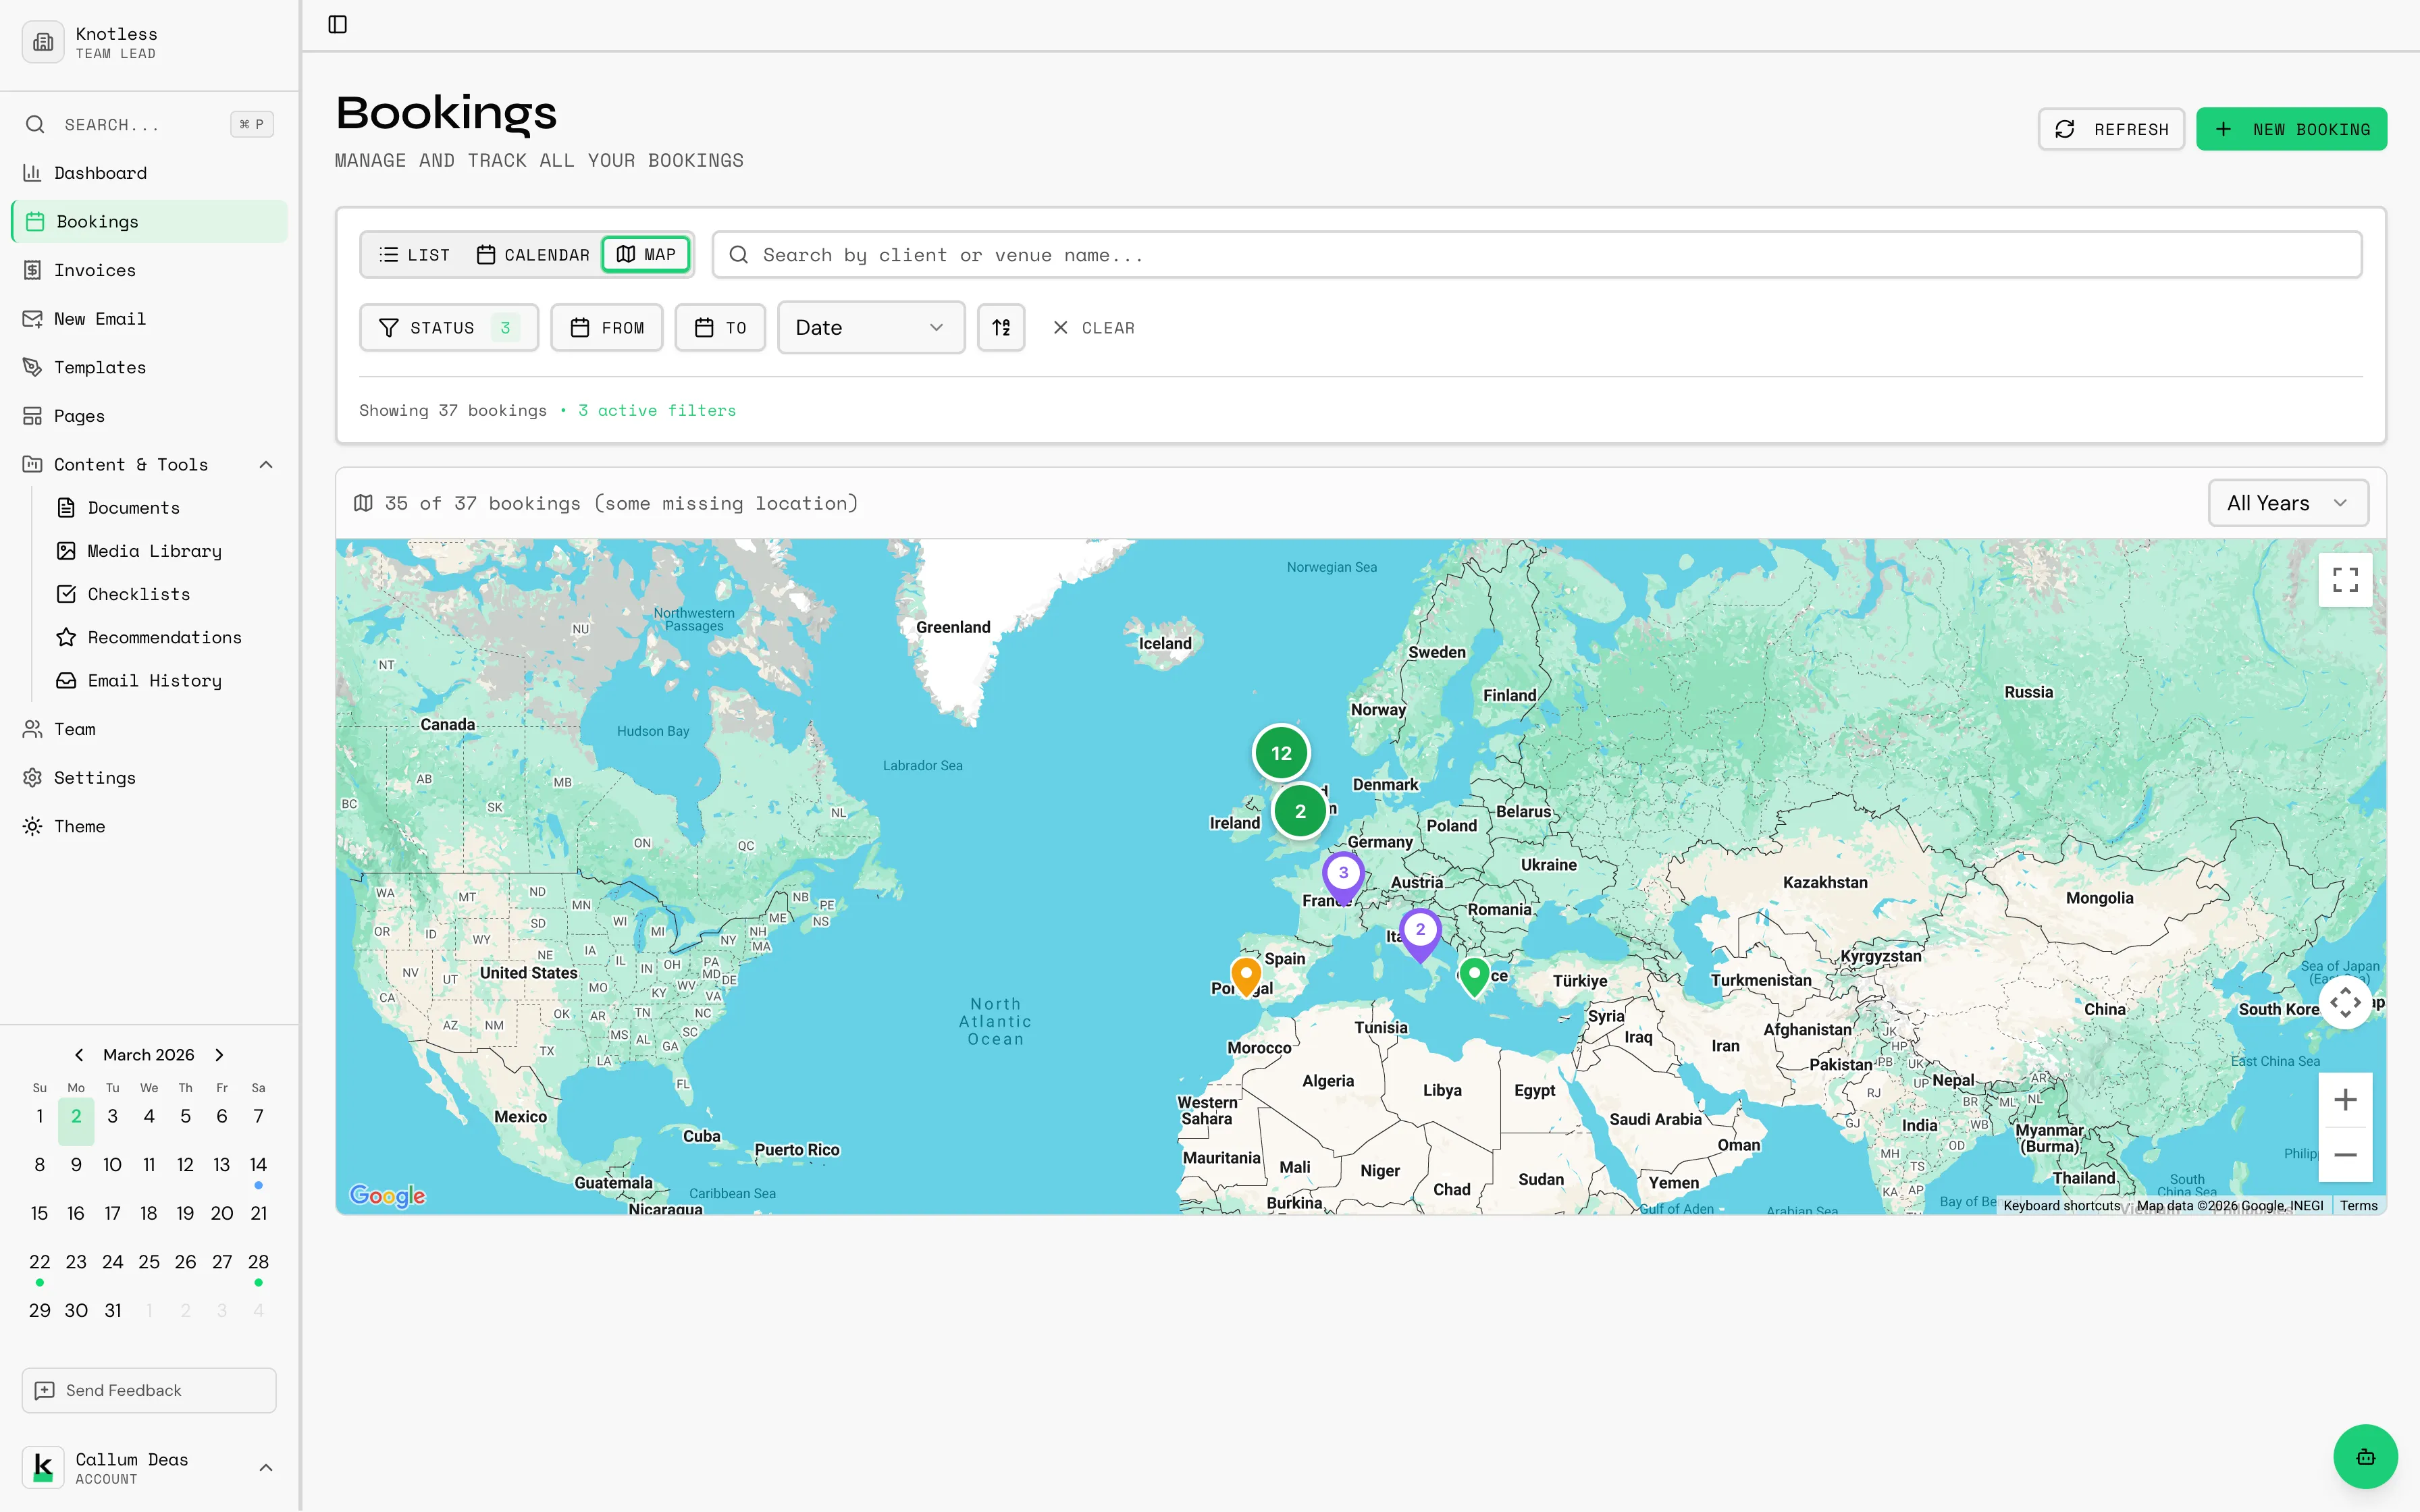
Map View
Section titled “Map View”View your bookings plotted on a map based on their venue locations. This is useful for planning travel and seeing the geographic spread of your events.
Searching and Filtering
Section titled “Searching and Filtering”Find bookings quickly using the search and filter tools at the top of the bookings page:
- Search by client name or event details
- Filter by status to show only bookings at a specific stage
- Filter by date range to narrow down to a time period
- Sort by different fields (date, name, status)
Booking Details
Section titled “Booking Details”Click on any booking to view its full details page:
Information Displayed
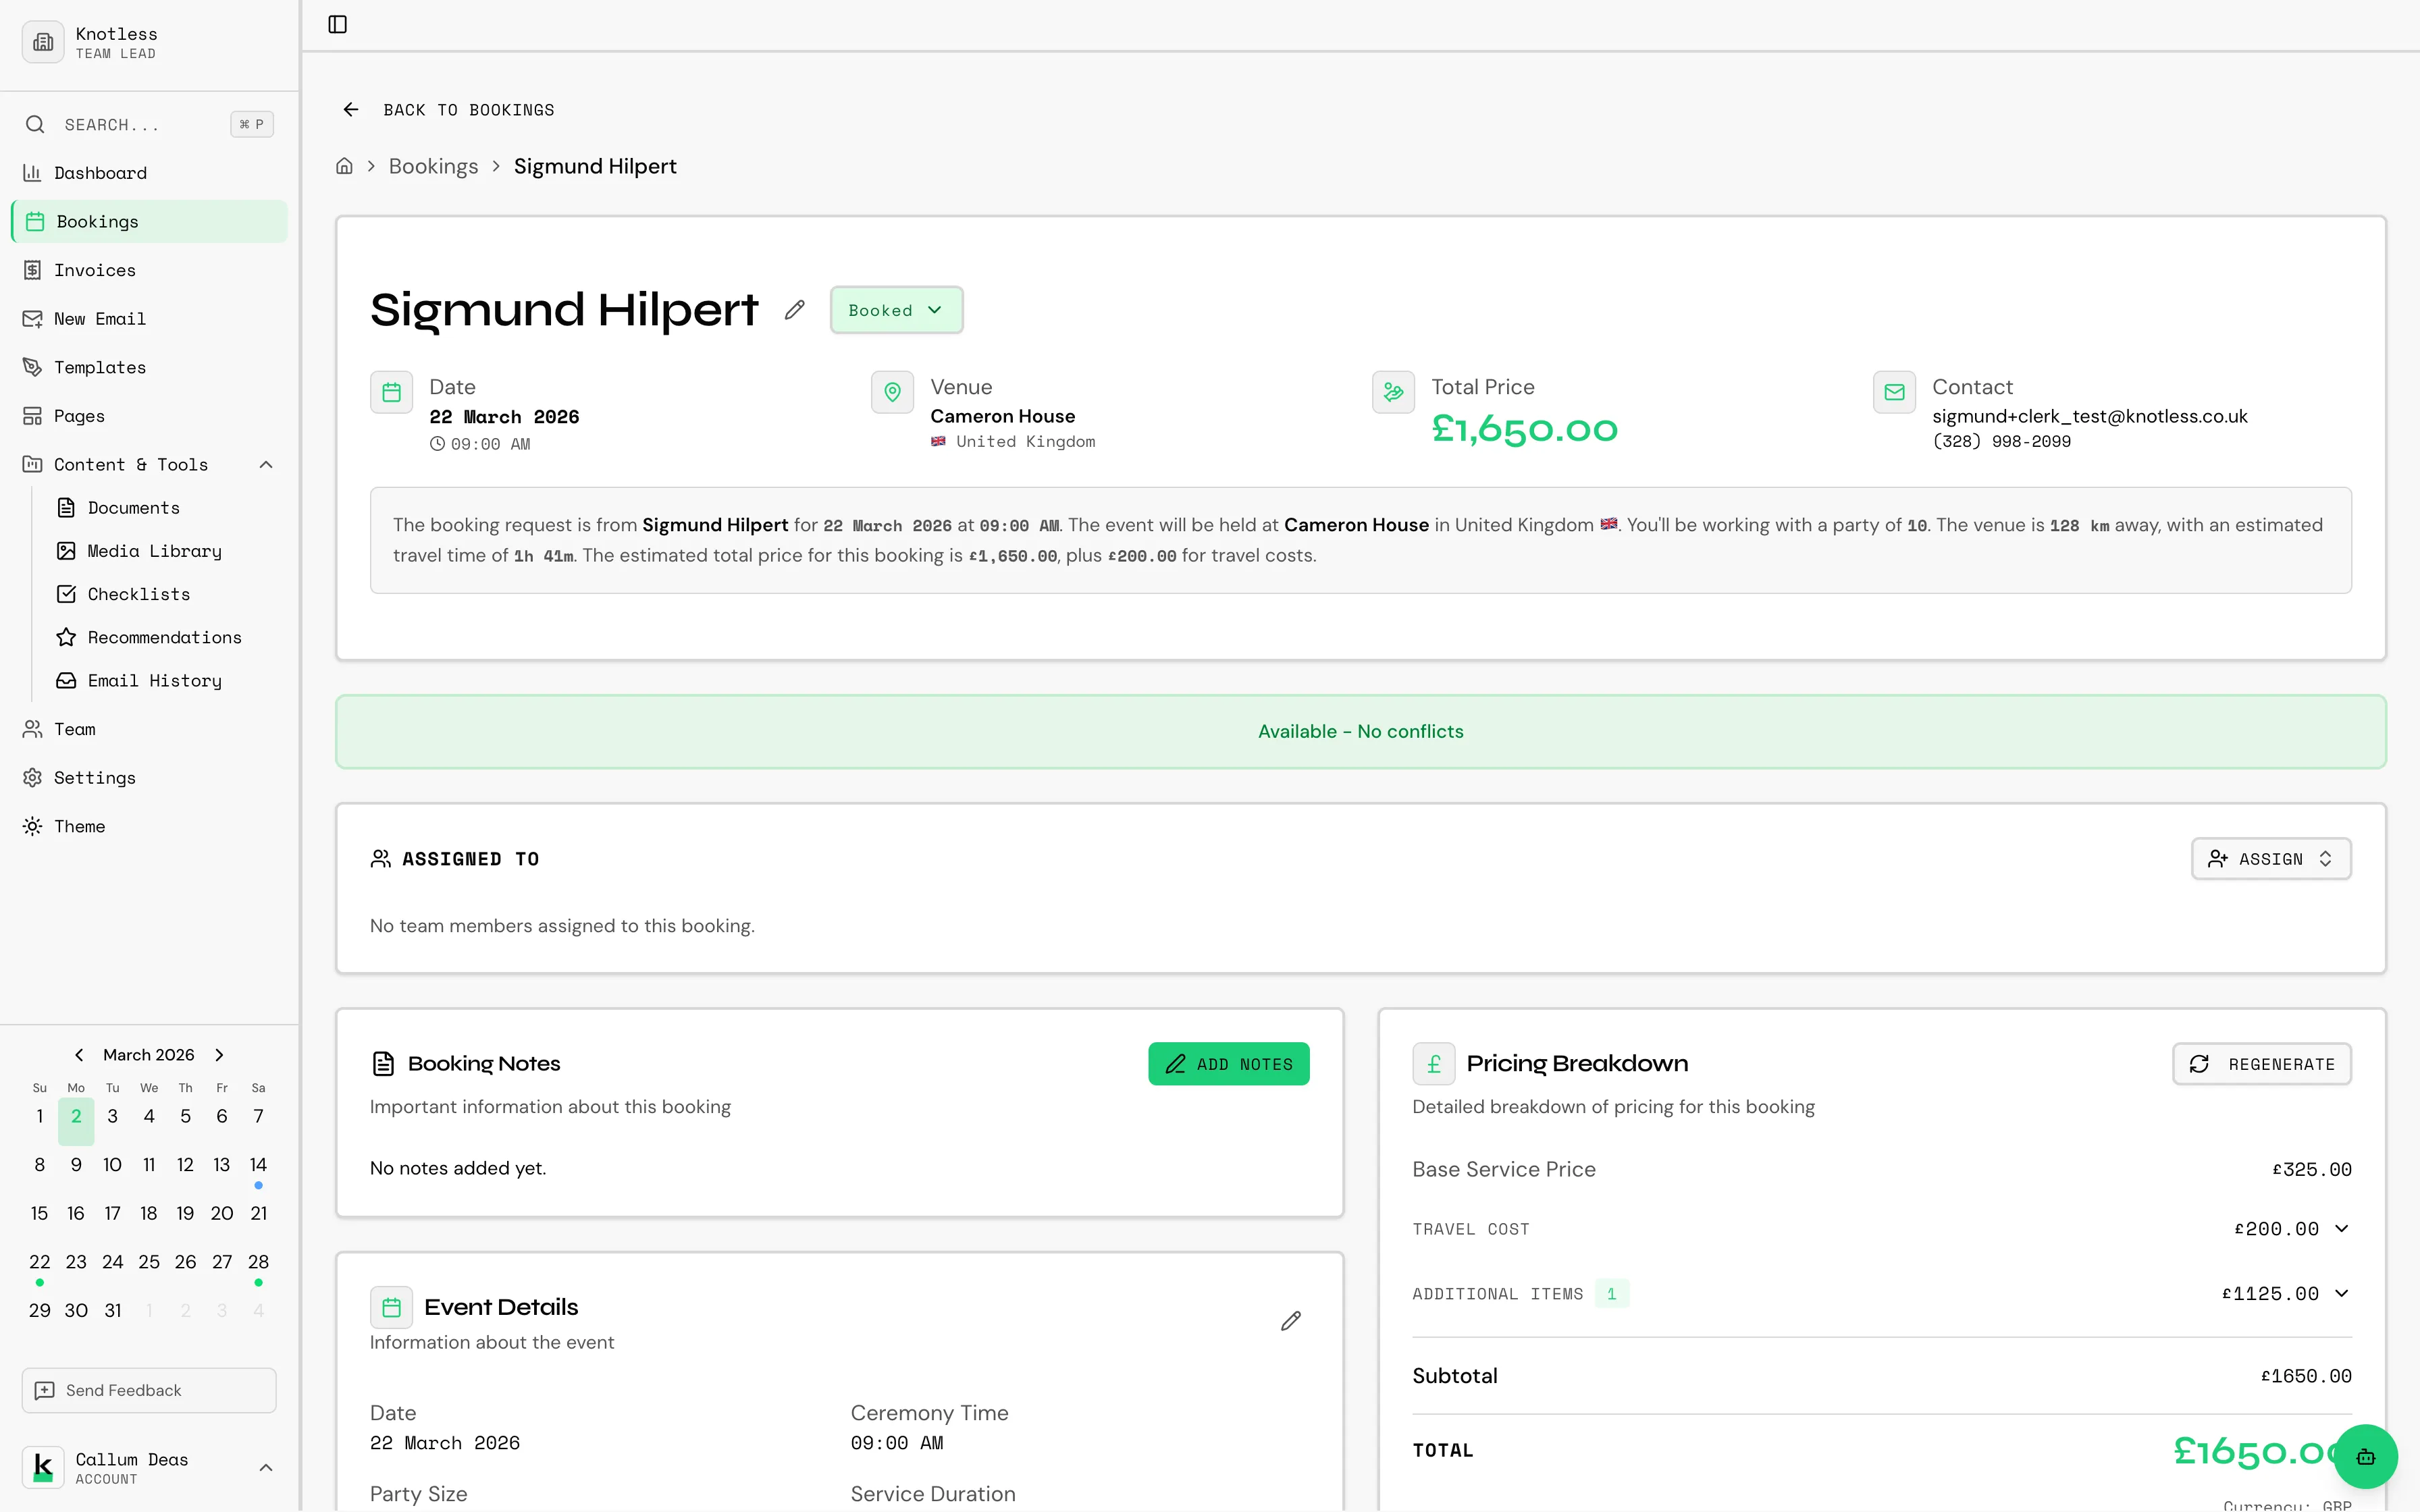
Section titled “Information Displayed”The booking detail page shows:
- Hero section with status badge, client name, event date, and venue
- Breadcrumb navigation back to the bookings list (preserving your filters)
- Pending approvals banner if there are emails or pages awaiting your approval
- Detail cards organised in a grid showing:
- Client contact information
- Event date and time
- Venue with map
- Travel distance and estimated travel time
- Party size
- Notes
- Payment/invoice status
Editing Bookings
Section titled “Editing Bookings”To edit an existing booking:
- Open the booking from the list or calendar
- Click Edit
- Make your changes
- Click Save
Deleting Bookings
Section titled “Deleting Bookings”To delete a booking:
- Open the booking details
- Click More Options (three dots)
- Select Delete Booking
- Confirm the deletion
Deleted bookings cannot be recovered. Consider marking as “Cancelled” instead to maintain records.
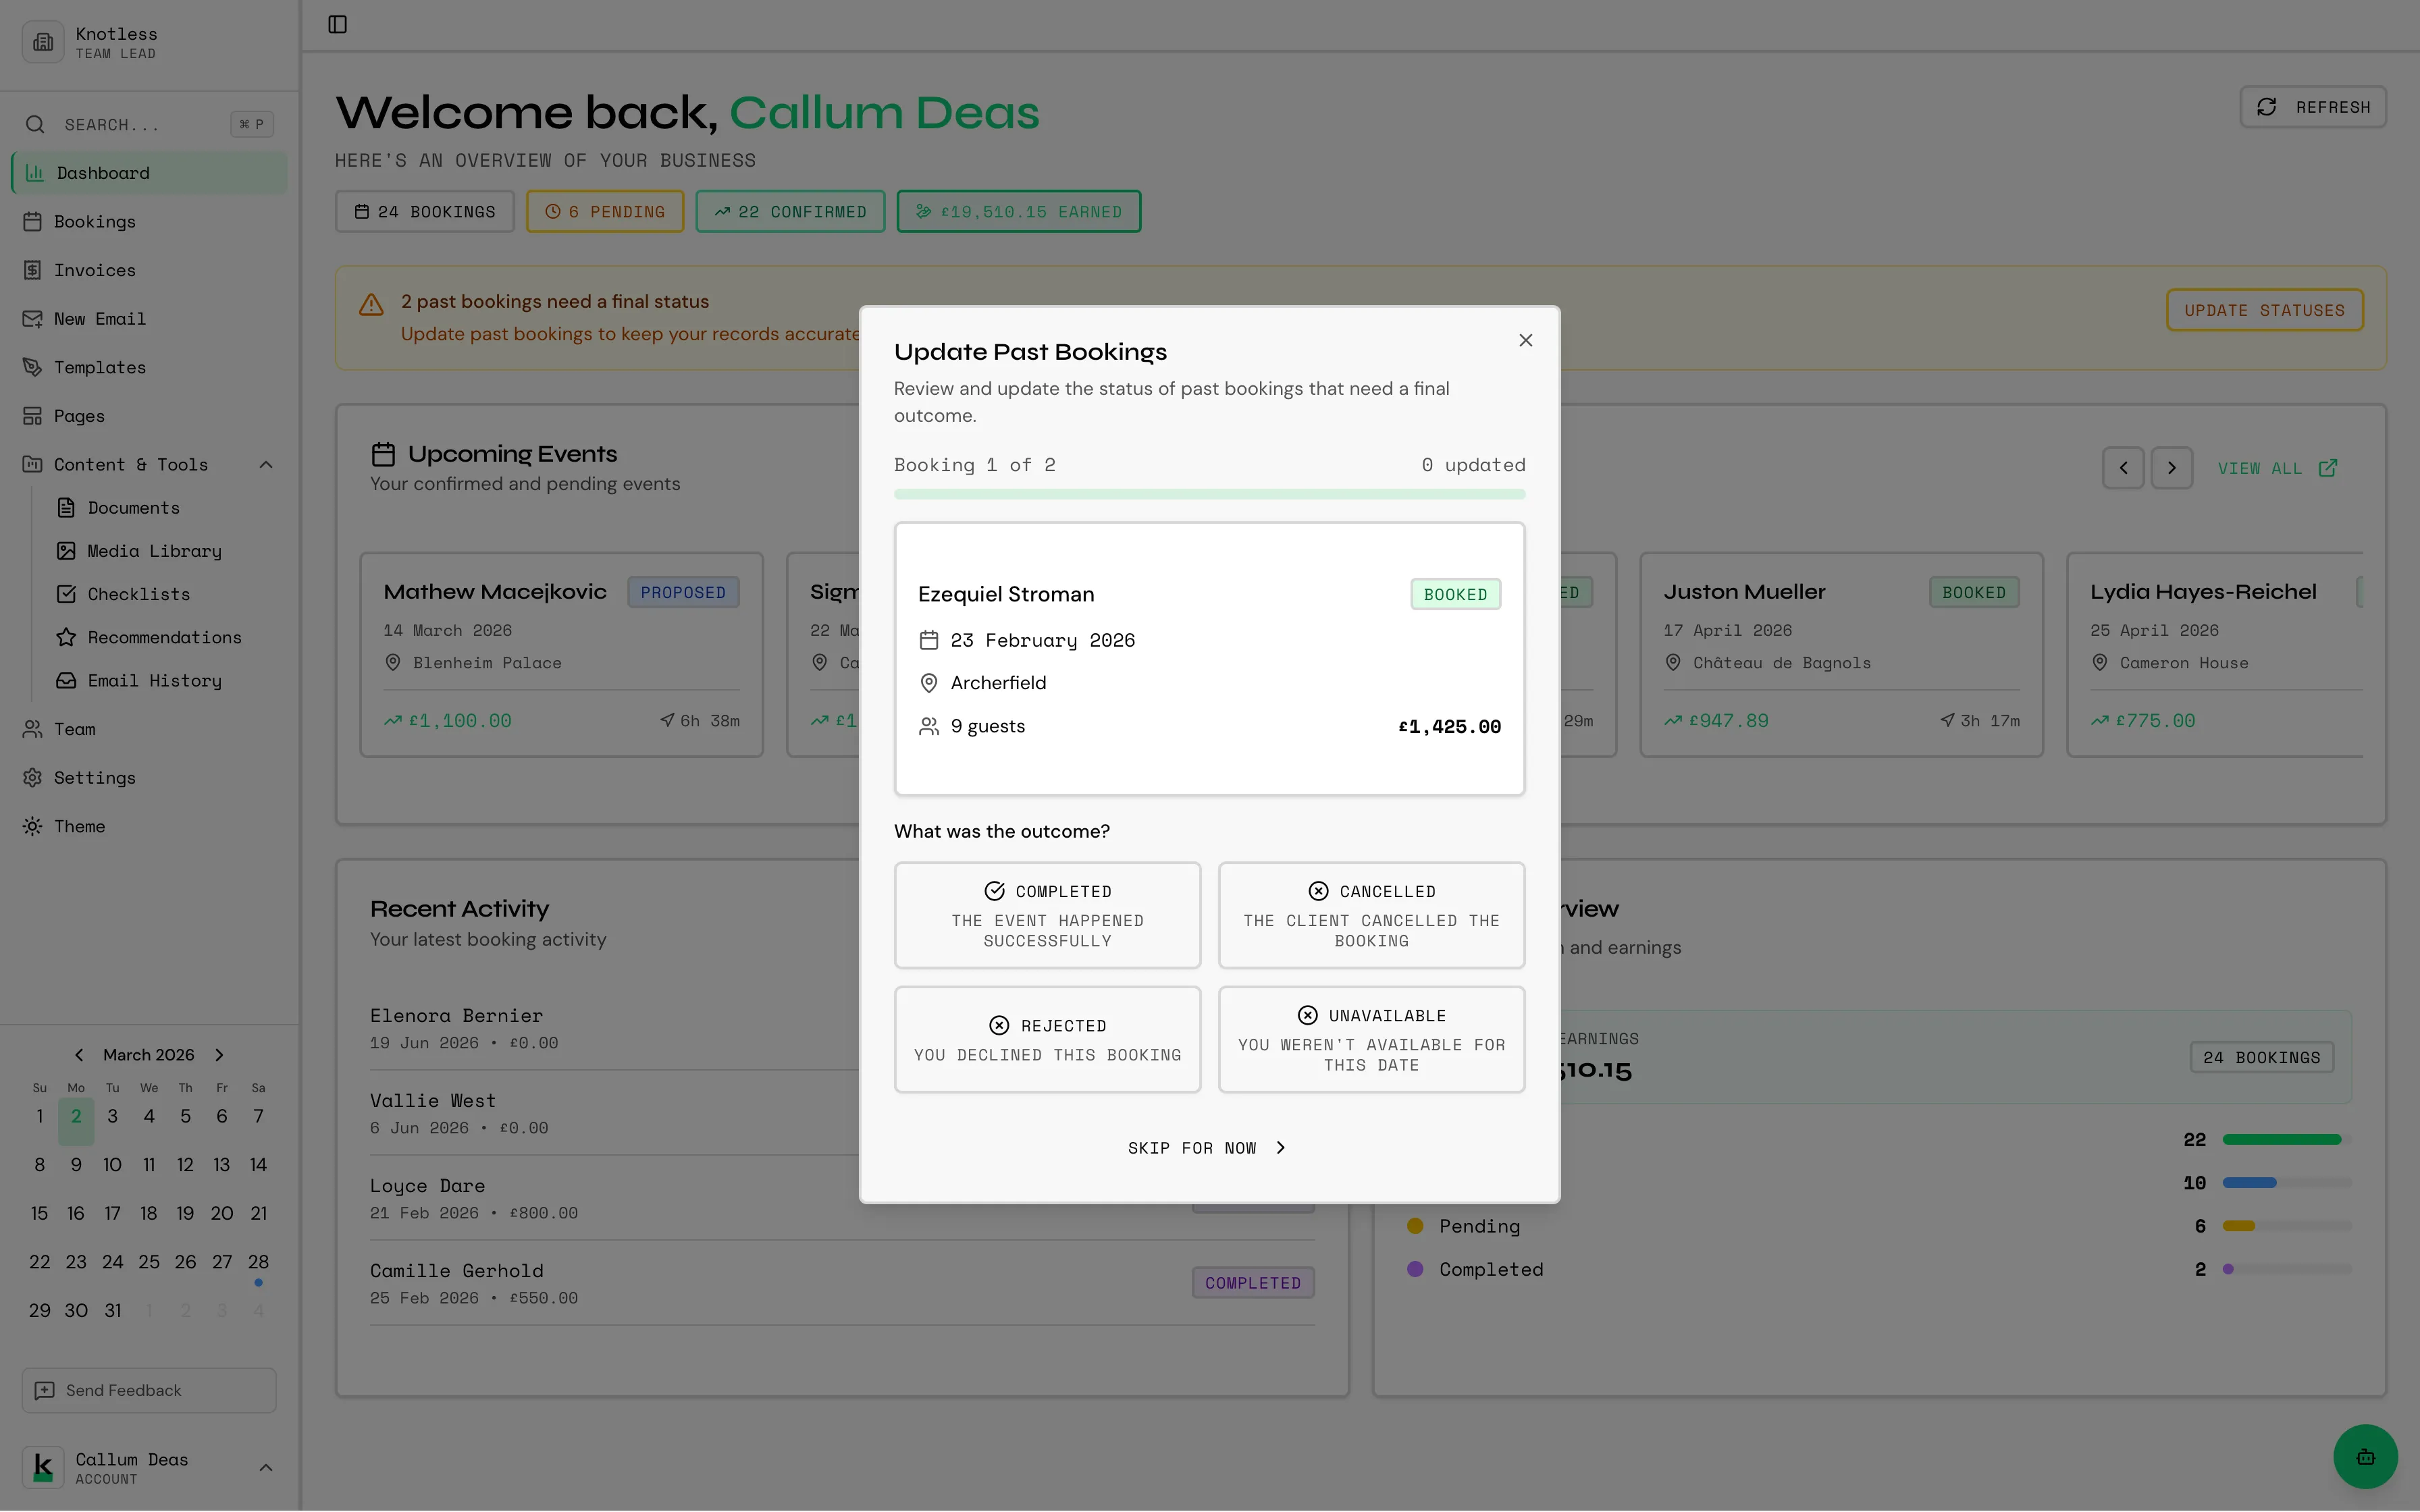
Stale Bookings Wizard
Section titled “Stale Bookings Wizard”If you have bookings that haven’t been updated in a while, Knotless will show a stale bookings banner on your dashboard and bookings page. Click it to open the wizard, which guides you through each stale booking so you can quickly confirm, cancel, or update them.
Next: Learn about Email Templates & Builder to create professional emails for your clients.