Team setup
A team account lets several people share one workspace: bookings, clients, templates and workflows. One person is the team lead; everyone else is a team member or a team admin (see Team admins). Team accounts need the Team plan (see Your plan).
Who can manage a team
Section titled “Who can manage a team”Go to Settings → Account → Team.
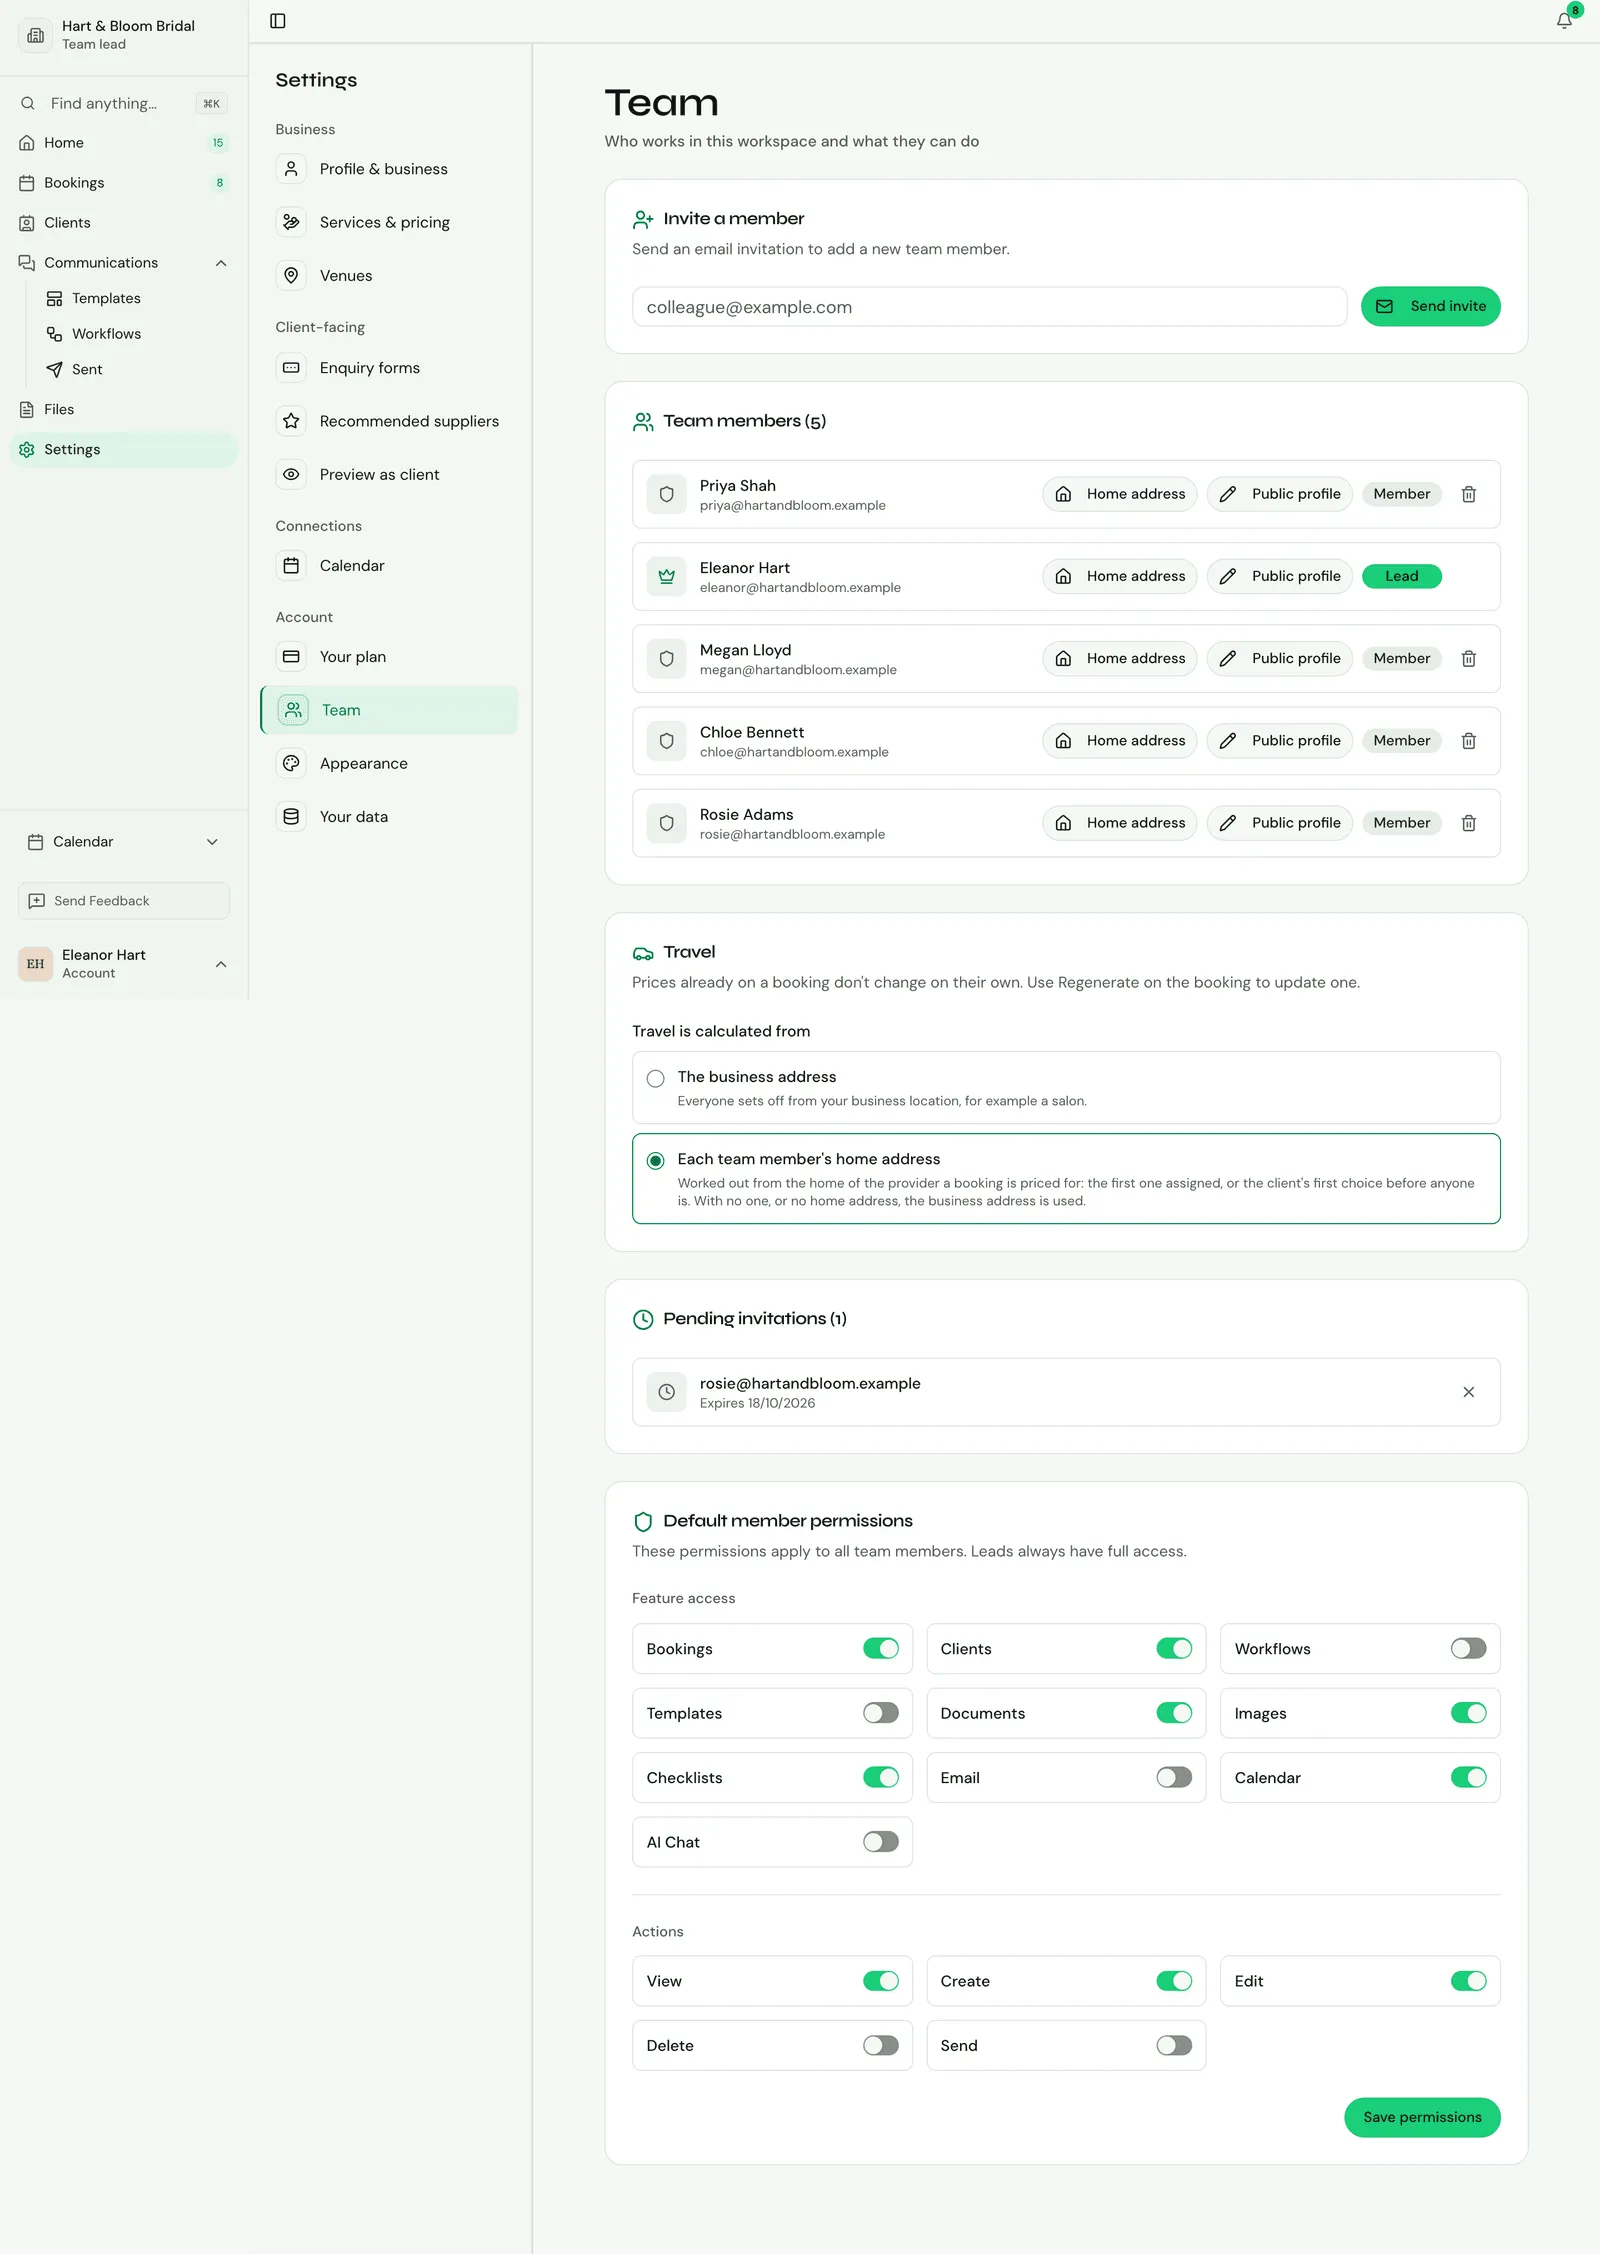
- Only the team lead can invite or add and remove members, revoke invitations and change permissions.
- Team members see a read-only list of the team (Your team) and their own permissions (Your permissions).
- Solo providers see Work with others instead, which explains what a team account adds.
Inviting new members needs an active Team plan. If the plan lapses, you can still manage and remove the members you already have.
The Team plan includes 3 seats, yours included. Extra seats go on the bill as people join. A team admin takes a seat like anyone else with a login. Team members without app access aren’t counted as seats. See The Team plan.
If you belong to more than one workspace, switch between them from the menu at the top of the sidebar.
Inviting a member
Section titled “Inviting a member”To add a new member to your team, invite them by email:
- Go to Settings → Account → Team.
- In Add a member, choose Team member (a provider who can be booked) or Team admin (see Team admins).
- Enter their email address.
- Click Send invite.
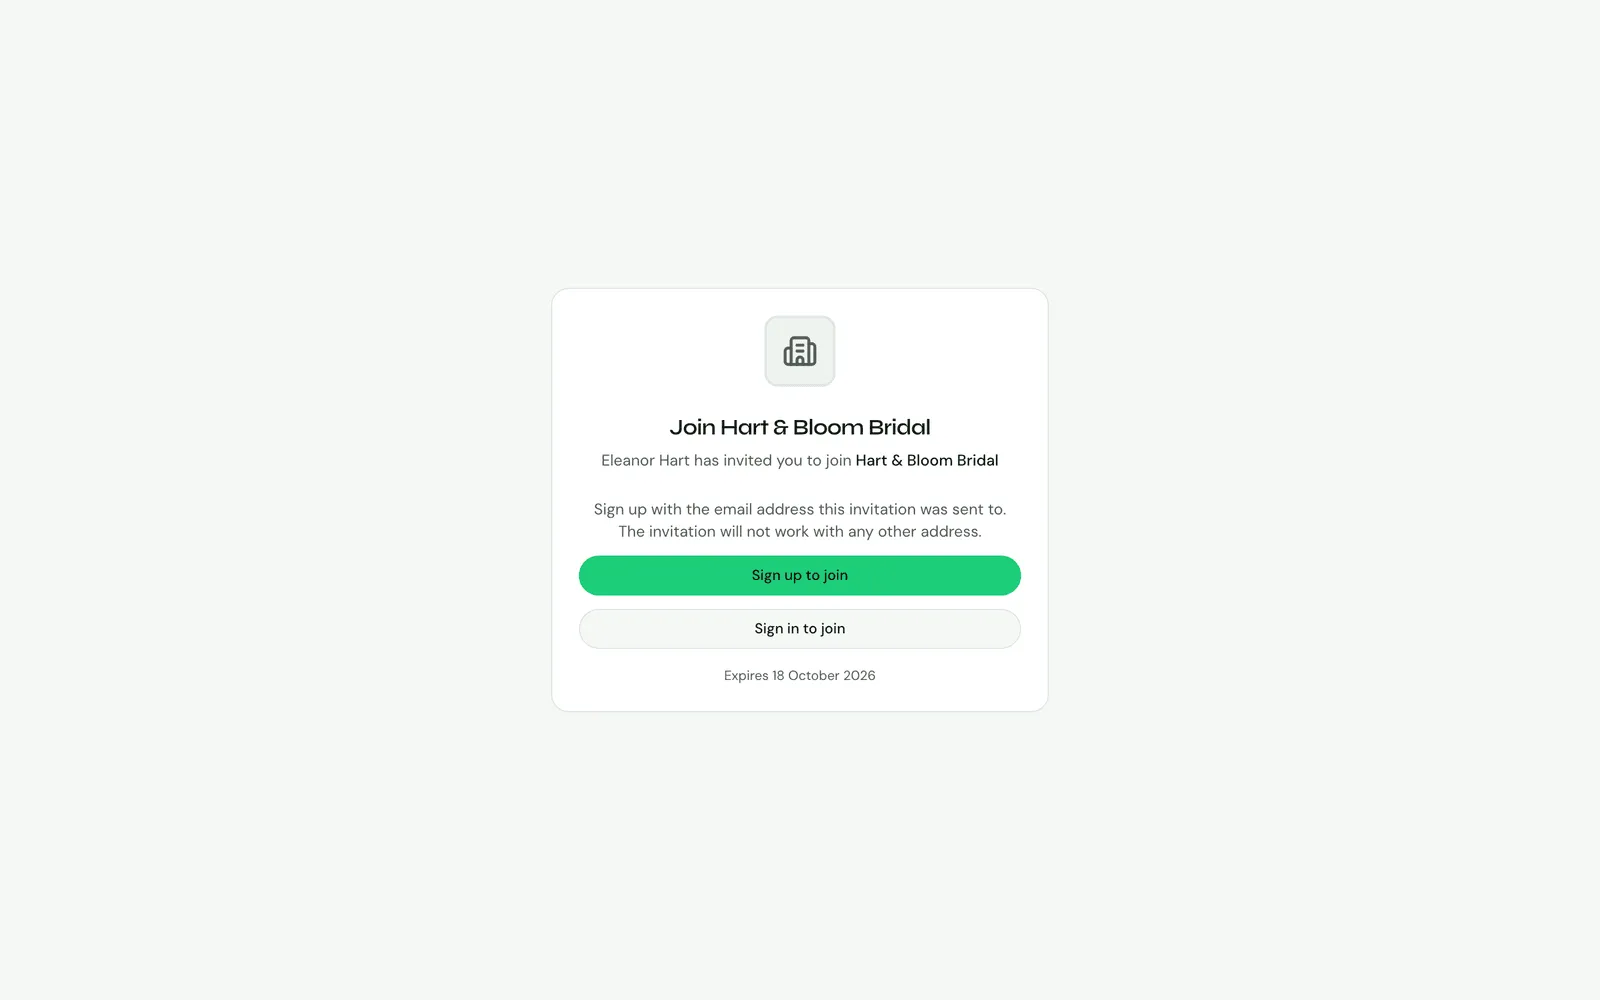
They get an email invitation. The link opens a “Join {your business name}” page, where they choose Sign up to join (or Sign in to join if they already have a Knotless account), then Accept invitation. They must sign up with the email address the invitation was sent to; it won’t work with any other address. An invitation expires after 7 days, and can only be used once.
Someone who already has a Knotless account also sees a Team Invitation banner when they sign in, with Accept Invitation.
Team members without app access
Section titled “Team members without app access”Some team members never use Knotless themselves: you check who’s free and assign them by hand. Add them without an invitation:
- Go to Settings → Account → Team.
- In Add a member, click Add team member (no app access).
- Enter their Display name, and if you like an Email (used to email them their run sheet when you send it, and the client’s dates for trials they do), photo, bio, profile link and the services they cover.
- Click Add team member.
They show No app access on their row. You manage everything for them from that row: their tier, prices, pay, home address and time off, and you can assign them to bookings. They appear to clients like anyone else on the team.
They never get a login, and Knotless emails them only about their run sheet and the trials they do:
- A Send Email step to the assigned provider skips them. If everyone assigned to the booking has no app access, the step is skipped and the workflow carries on.
- Ask preferred providers in turn never asks them (see Ask preferred providers in turn). When a client picked them, the booking’s Provider requests card lists them to assign by hand, and the result names them rather than saying no one confirmed.
- Messages from the client aren’t copied to them.
- On a booking’s Questionnaires card, Email to {name} sends one of them their own run sheet link, which also shows the client’s questionnaire answers, only when you press it (see Questionnaires).
- When they’re a booking’s trial artist, they’re emailed the client’s suggested trial dates and can answer with one tap (see The trial artist answers by email).
- The one exception is calendar invites: if you switch them on for someone with an email, Google emails them an invitation for each accepted or booked wedding they’re on, timed to their own run.
Without an email, none of those can reach them. A booking says so wherever it matters: the booking’s Staffing card (Assigned to in the app) shows “No email — {name} won’t get run sheets by email.” (“…run sheets or calendar invites by email.” once calendar invites are on), the list of people you can assign marks them No email, and so does the Questionnaires card. A trial artist without one shows “No email — {name} won’t get trial dates by email.” on the suggested trial dates. As the lead you also get Add email, which opens that person’s details here with the email field ready; once you save, you’re back on the booking. A team admin sees the note only.
They aren’t counted as seats on the Team plan, and there are no permissions to set for them.
Inviting them to Knotless later
Section titled “Inviting them to Knotless later”If one of them wants their own login later, click Invite to Knotless on their row, check the email address and click Send invite. Their row shows Invitation sent until they accept. When they accept, they keep their row: their bookings, time off, prices and details stay with them, they get the team’s default permissions, and they count as a seat.
An ordinary invitation to the email address of someone already on the team without app access isn’t sent: use Invite to Knotless on their row instead.
Pending invitations
Section titled “Pending invitations”Invitations that haven’t been accepted yet are listed under Pending invitations, with when each expires. An invitation to a team admin says Team admin. To cancel one, click the × next to it and confirm Revoke invitation. The link stops working straight away, and you can send a new invitation later.
- Lead: the account owner. Leads always have full access to everything.
- Member: a provider. What a member can use is set by the team’s default permissions, or by their own (see Permissions for one member).
- Admin: a team admin, who runs the team’s bookings, clients and staffing without being a provider (see Team admins).
Team members lists everyone in the team with their email address, a Lead, Member or Admin badge, and Custom permissions for anyone with their own.
Team admins
Section titled “Team admins”A team admin runs the team’s logistics. They aren’t a provider: they’re never assigned to a booking, have no availability, aren’t paid and aren’t shown to clients.
What a team admin can do:
- See and work on every booking and every client, not just their own: change a booking’s stage, message clients, and handle documents, images and checklists.
- Assign and unassign providers, see who’s free, ask preferred providers, and clear a booking’s review flag.
- Add clients, merge duplicates and change a client’s email address.
- Record anyone’s time off.
What stays with the team lead: billing and your plan, connecting Stripe or Square, payouts, team pay, prices and tiers, enquiry forms, inviting and removing people, and changing anyone’s permissions or role. Workflows and AI Chat are off for team admins.
A team admin has a Knotless login, so they take a seat on your plan.
Making someone a team admin
Section titled “Making someone a team admin”Invite them as a team admin (see Inviting a member), or switch an existing member:
- On their row in Team members, click Role.
- Choose Team admin, then Make team admin.
Switching removes their services, own prices, tier and calendar invitations, as a team admin is never booked. Bookings they’ve already done stay as they are. Someone who is still on a booking that hasn’t happened yet can’t be switched: assign someone else to those bookings first. Only people who have joined and use Knotless can be a team admin.
To make a team admin a member again, choose Team member. They follow the team’s default permissions, and you add their services and prices again before they can be booked.
A team admin’s permissions
Section titled “A team admin’s permissions”A team admin’s access is the same for everyone in the role, except Invoicing, which starts at No access. To change it, click Permissions on their row. Invoices show each service’s price, including colleagues’ own prices, which the rest of Knotless hides from anyone but you.
What a team admin sees
Section titled “What a team admin sees”Home shows a team admin the whole team’s enquiries and upcoming bookings, but not Booked value, which counts a person’s own bookings. Settings shows them Team, Appearance and Your data.
Member permissions
Section titled “Member permissions”Under Default member permissions, set a level for each area: Bookings, Booking status, Clients, Workflows, Templates, Documents, Images, Checklists, Invoicing, Email, Calendar and AI Chat. New members start with these, and so does everyone who follows the team defaults.
- No access: the area is hidden from them.
- View: they can look but not change anything.
- Edit: they can also add and change things.
- Full: they can also delete, and send where the area sends something (emails, invoices and templates).
Each area only offers the levels that make a difference there. Calendar and AI Chat are No access or View, Clients goes up to Edit (adding, merging and deleting them is for the lead), and Email is No access, View (see sent emails) or Full (send them).
A level applies to that area only. For example, a member with Full on Invoicing and View on Email can send invoices but not emails.
Booking status is Can’t change or Can change, and is off for members unless you turn it on. It covers moving a booking between stages (including from the bookings list and Update statuses), postponing, cancelling, declining or reopening it, and adding a trial or an extra. It needs Bookings at Edit too. Without it, a member still works on the booking itself, and marks their own arrival on the day.
What the levels hide:
- Email: No access stops a member messaging the client and hides the emails sent on their bookings, in Sent and on the booking’s activity. Anything that emails the client, such as asking them to confirm their details or suggest trial dates, needs Email at Full.
- Templates: No access hides your templates and the page links sent. Where a member needs to pick a page, such as for a checklist’s agreement, they see page names only. A member who can send email, or see workflows, can still read the templates those use.
- Workflows: No access hides workflows, recipes, approvals and what’s coming up on a booking.
If a member’s permissions were set in a way that matches none of the levels, the area shows Mixed until you pick a level.
Click Save permissions when you’re done. Members with their own permissions (see below) keep them, and the message says how many.
Permissions for one member
Section titled “Permissions for one member”To give one person different permissions, for example letting a senior provider send client emails while an assistant only works on bookings:
- On their row in Team members, click Permissions.
- Set a level for each area, then click Save permissions.
They get the new permissions straight away, and a Custom permissions badge shows on their row. Changing the default permissions later doesn’t change theirs. To put them back on the team defaults, open Permissions again and click Use team defaults.
The team lead always has full access, so there’s no Permissions button on the lead’s row.
Team pay
Section titled “Team pay”Record what you pay each team member for the weddings they work. This is what your business pays its own team: it isn’t a client payment, and it never shows on invoices, the client’s pages or your income figures.
Each member’s usual pay
Section titled “Each member’s usual pay”On a member’s row in Team members, click Pay and choose:
- A fixed amount per wedding, for example £150; or
- A percentage of their services: a share of the services that person does on each wedding. Travel, discounts and VAT aren’t included.
A percentage is worked out on each person’s own share of the booking’s price:
- A line for a service, such as bridal hair or bridesmaid makeup, belongs to whoever is doing that service. With two people on hair, the hair lines are split equally between them.
- When people on different tiers share a service and each person is priced at her team member’s tier, each person’s price goes to the team member doing her. With Jenn doing six bridesmaids’ makeup at £150 and Erika the bride’s (£200) and one bridesmaid’s (£125), Jenn’s share is £900 and Erika’s £325. Pay follows the Day plan’s placements, the automatic ones included; someone the Day plan gives to nobody is shared equally between the people doing that service.
- A line that isn’t one service’s, such as your base price, a call-out or stay-late fee, or a trial or extra not set up for a service, is split equally between everyone on the booking. That includes you when you work the wedding yourself: your share is part of the split, but it isn’t team pay, so it isn’t paid to anyone. Someone suspended from the team since they were assigned keeps their share: they did the work.
- A service nobody on the booking is doing isn’t counted in anyone’s pay.
For example, with Kristen on hair (£975) and Aleshea on makeup (£325), both on 60%, Kristen is paid £585 and Aleshea £195. A £100 stay-late fee on the same booking adds 60% of £50 to each.
Travel in pay
Section titled “Travel in pay”Each person is also paid the travel you charge the couple for their own drive: their share of the mileage, drive time and parking and tolls, exactly as charged (so if you typed over the travel price, that’s what’s shared). When the team travels together, all of the travel goes to the person whose home it’s from: they drove. Flights and overnight stays aren’t added to pay, as the business usually books those. Travel is added on top of what you pay for their services, for example “£585.00 · 60% of their services + £35.00 travel”.
Click Save pay. Only you and that member see it. The team lead has no Pay button: you own the business, so your own weddings aren’t team pay.
Pay on one wedding
Section titled “Pay on one wedding”Open the booking and go to its Team & automation tab. In the Staffing card, Team pay lists each person on the booking with their pay for that wedding, for example “£585.00 · 60% of their services” or “Team default: £150.00”. Pay follows the booking: re-pricing it or changing who is assigned changes the figure. Click Edit to pay someone differently for this wedding only, and add a private note.
When you’ve paid them, click Mark paid. The amount, travel included, is then fixed: later price changes don’t move it. Mark unpaid puts it back. A wedding with a percentage but no price yet has no pay to mark paid until it’s priced.
What you owe each month
Section titled “What you owe each month”The Team pay card in Settings → Account → Team shows a month at a time, by wedding date: for each member, their weddings, the total, what you’ve paid and what you still owe. Open a member to see each wedding and mark it paid. Weddings count when they’re booked, awaiting completion or completed; a cancelled wedding only counts if you’d already paid for it. The totals include travel, and say how much of it is travel. Export CSV downloads the month for your accounts, with each wedding’s pay, travel and total.
If you remove someone from the team, what you’d already paid them stays in the totals under their name. Pay you hadn’t paid yet goes with them.
What a member sees of their pay
Section titled “What a member sees of their pay”Each member sees only their own pay: Your pay in Settings → Team (this month and last, with what’s paid and what’s to come), and “Your pay for this wedding” on each booking they work. They never see anyone else’s pay or how a percentage was worked out.
Showing pay when you ask
Section titled “Showing pay when you ask”At the bottom of the Team pay card, turn on Show team members their pay when asking them to work. It’s off until you turn it on, and only you can change it.
When it’s on, the email asking a team member to take a booking and the page they answer on both show Your pay: what you’ll pay them for that wedding, worked out the same way as above, as if they took the service they’re asked about. When travel is worked out from each team member’s home, it says “plus travel”: their own drive is only known once they’re on the booking. They only ever see their own figure, never anyone else’s pay, the couple’s price or how a percentage was worked out. If there’s no figure yet they see Not set yet (no pay set for them), or Worked out once the booking is priced (a percentage on a booking with no price yet). You aren’t shown a pay line when you’re asked yourself.
The email shows their pay when it’s sent. The page shows the current figure, so it follows a re-price while the request is open. Once they’ve answered, the page no longer shows it; their pay for the wedding is on the booking as usual.
What team members see
Section titled “What team members see”- Bookings: only the bookings they’re assigned to. A member can’t see the rest of the team’s bookings.
- Adding a booking: a member who adds a booking is put on it. If they’re already on another booking that day (or, for an appointment, at that time), the form says so as they pick the date, and the booking is saved without them. You’re told in the bell and on your phone that it needs a team member, so you can assign it. They can’t open it until someone puts them on it.
- The team: a read-only list of members (with who leads the team, and Invited for anyone who hasn’t joined yet), and their own permissions.
- Needs review: they see the banner on a booking but can’t clear it, and they don’t see the Provider requests card. See Ask preferred providers in turn.
- The AI assistant: only with the AI Chat permission, and only about their assigned bookings (see AI assistant).
- Notifications: only about bookings they’re assigned to. They never see new enquiries, which are yours to answer.
They’re also told, in the bell, on their phone and by email, when you put them on a booking (or a workflow does), when you take them off one, and when you or a team member changes a booking of theirs: its date, ceremony time or venue, or postpones, cancels or reopens it. A workflow’s Update status step doesn’t notify them yet. Accepting a request to work a wedding shows in the bell only. Nobody is told about a change they made themselves, and members with no app access are never notified.
Services and priority
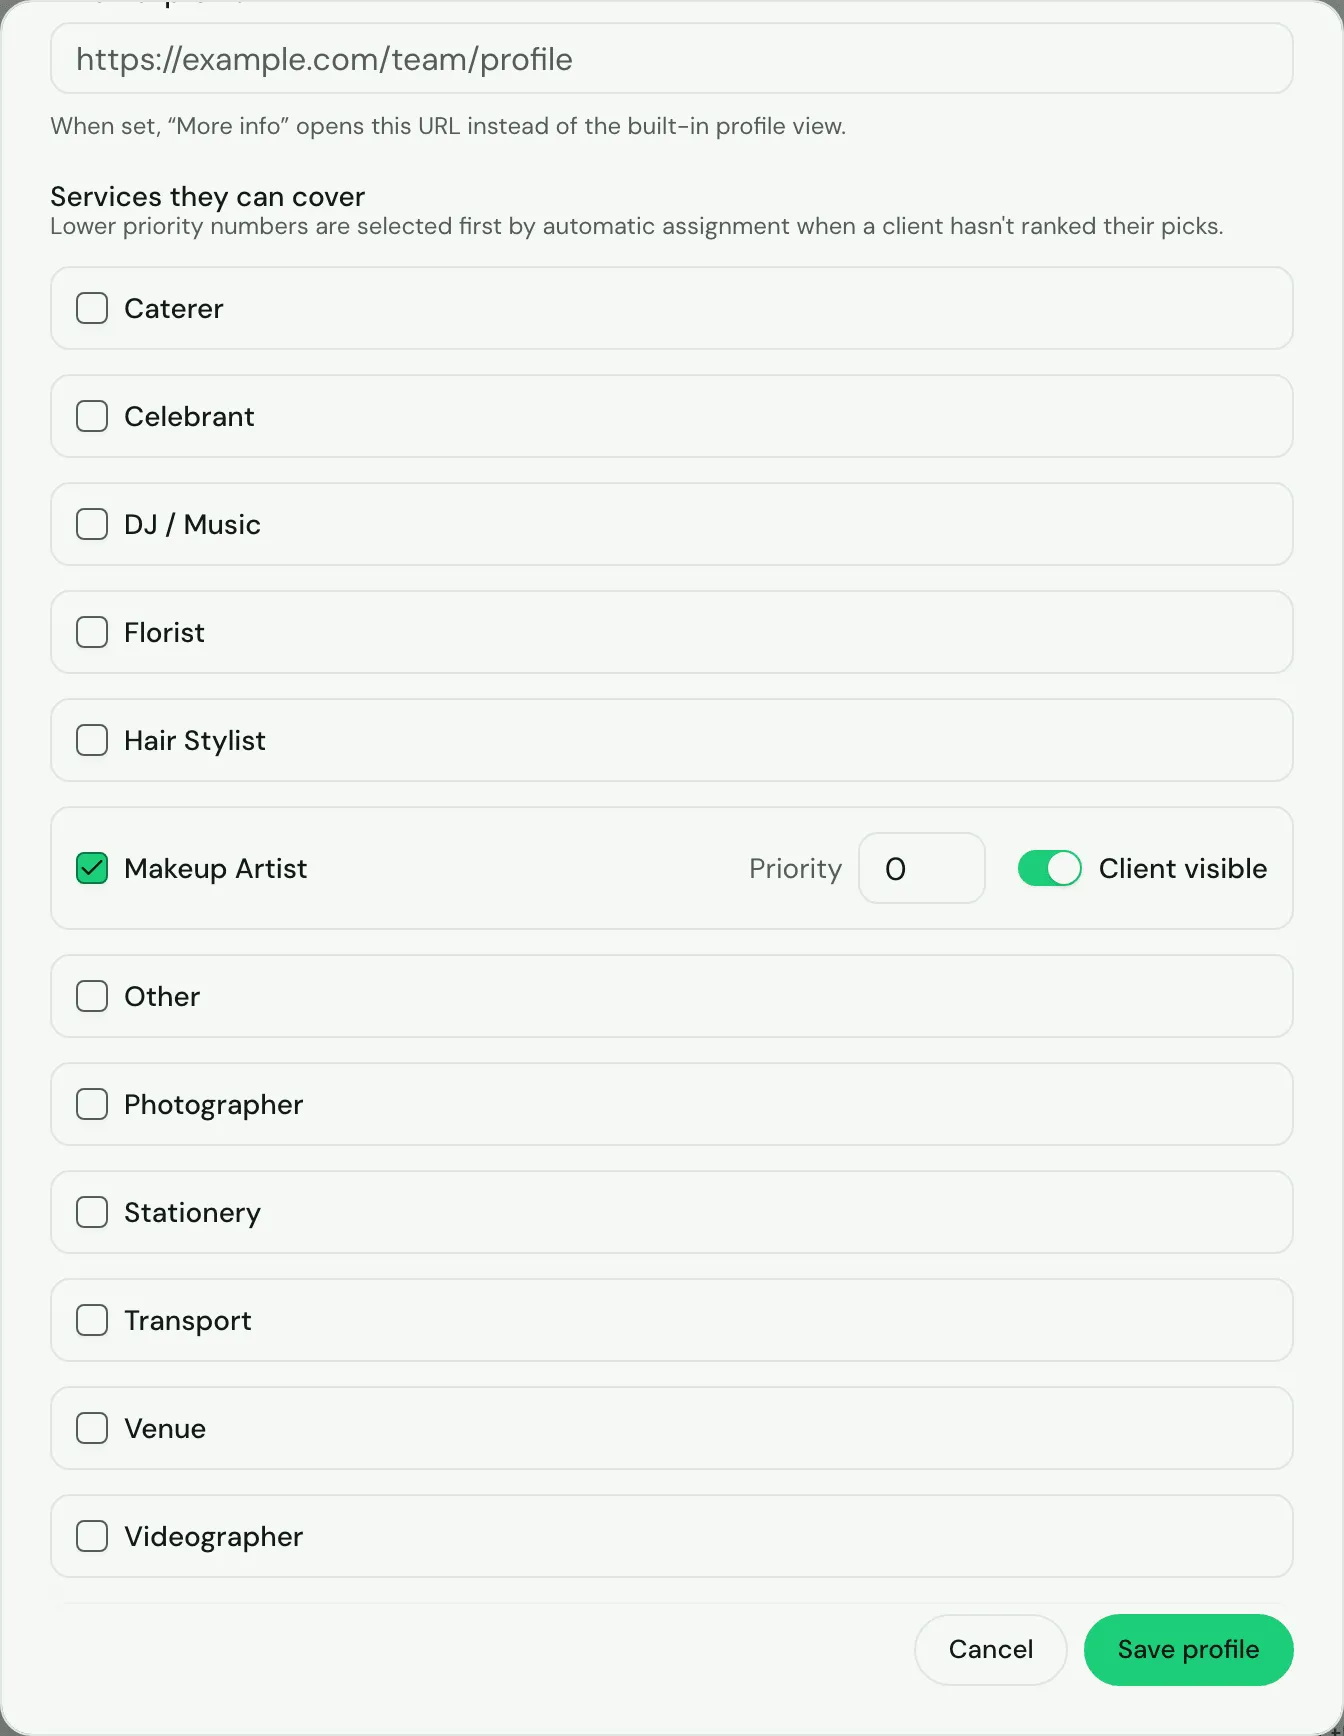
Section titled “Services and priority”Set which services each team member does (and so can be assigned to) on their public team profile. Next to a member on the Team page, click Public profile to open Edit public team profile:
- Display name, Photo, Bio and External profile link. These can appear to clients choosing a preferred provider.
- Services they can cover: tick each service this person offers. For each ticked service:
- Priority: a number. Lower numbers are picked first by automatic assignment when a client hasn’t ranked their picks.
- Client visible: whether clients can choose this person for the service on your enquiry form.
Click Save profile.
Usual trial days
Section titled “Usual trial days”If someone only does trials on certain days, open their Public profile and, under Usual trial days, turn off the days they don’t do. Every day is on by default (any day), and at least one has to stay on. When they do a booking’s trial, the trial dates offered online are only on those days, and never on a date they’re off or booked elsewhere (see Who does the trial).
Assigning someone to a booking by hand
Section titled “Assigning someone to a booking by hand”- Open the booking and go to its Team & automation tab (or click the Team line at the top of the booking).
- In the Staffing card, find the service, such as Makeup.
- Click Assign beside the person you want. This puts them on that service only.
- To have the same person do another service too, such as makeup as well as hair, click Assign beside them again under that service. Under a service they’re not yet on, they show “Also on hair”.
- Click Remove beside someone to take them off that service. If it was the only service they were doing on the booking, they’re taken off the booking and told.
Only the team lead can change who is assigned. Each service lists the people who offer it, best first: the client’s choices in their order (see Preferred providers), then whoever is free, then anyone pencilled in elsewhere, then anyone on time off, then anyone already booked. Each person shows their tier and whether they’re Free, Pencilled in (with a link to that enquiry), on Time off or Booked (with a link to that booking), for the booking’s days (every dated day, trials included).
- Only someone Booked that day can’t be assigned.
- Someone Pencilled in can be assigned as usual: an enquiry doesn’t hold their day.
- Someone on Time off shows Assign anyway, and you’re asked to confirm first.
- Someone from a tier other than the one the booking was agreed at is asked about too; the price stays the same.
- Someone without app access says “No app access: tell them yourself”: Knotless doesn’t email them about the booking, so let them know. With calendar invites switched on for them, Google sends them the event once the booking is accepted.
- Other team members opens the people who don’t offer that service, in case you want one of them anyway, and anyone you’ve invited who hasn’t joined yet (“Invited · hasn’t joined yet”), who can’t be assigned.
- If nobody on the team has that service listed yet, the whole team shows under it, with a link to add services in Settings → Team.
Each service is filled separately: putting someone on hair doesn’t fill a makeup place, even if they do makeup too. Once a service has everyone it needs, it shows only who fills it; click Change to see the others.
Someone added from the mobile app’s team list is on the booking for every service they offer, as before. So is the team member who creates a booking, when they’re assigned to it.
Pencilled in
Section titled “Pencilled in”Assigning someone to an enquiry (a booking still Pending or Proposed) only pencils them in. Their day isn’t held, so they can be pencilled in on other enquiries that day too, and they still count as free for workflows. Their day is held from Accepted onwards.
The first booking to reach Accepted keeps them. When a second booking that day is accepted (or moved on to Booked), they’re taken off it, and that booking is flagged Needs review, with the reason saying who was taken off and the day they’re booked. The team lead gets a notification naming the booking they’re already on, the booking’s activity says who was taken off and the day they’re booked, and they’re told themselves if they use the app. The couple’s acceptance or deposit always goes through. If you change a booking’s status yourself, you’re told who will be taken off before you confirm.
Who’s free
Section titled “Who’s free”The team lead can see who is free in two places:
- On a booking: click Who’s free in the Staffing card. Each team member is shown against each of the booking’s dated days as Free, Booked (with the other booking) or Time off. A free day also says Pencilled in and names any enquiries they’re on. A trial with no date yet isn’t checked.
- For any dates: in Settings → Team, the Who’s free card checks a date or a range of up to 31 days.
“Booked” means on a booking that’s Accepted, Booked, Pending Completion or Completed: enquiries, and cancelled, declined and unavailable bookings, don’t count. Appointments only block their own time, and days are read in your workspace’s time zone.
Time off
Section titled “Time off”Everyone on the team can record their own time off in Settings → Team → My time off: a first and last day, whole days. The team lead can record or remove anyone’s from the Time off button on their row. Nobody else sees a colleague’s time off.
Time off doesn’t stop the lead assigning someone, but workflows treat it as unavailable: Check who’s free and the preferred-provider steps skip anyone on time off. If you record time off over days you’re already booked, you’re told so; you stay assigned until the lead changes it.
Checking who’s free in a workflow
Section titled “Checking who’s free in a workflow”The Check who’s free step (in the Assign group) checks whether enough team members — optionally only those offering one service — are free on every dated day of the booking. It has two paths: Enough team members free and Not enough free. An If can also read Team Members Free (the number found).
How many must be free is either A fixed number (1 to 20, default 1) or As many as this booking needs: the number worked out from the party size, the services booked and the ready-by time (see How many team members a day needs). With a service chosen, that’s how many people the service needs; without one, it’s the most any day of the booking needs. Until the numbers can be worked out (for example, no start time yet), it uses the number under If it can’t be worked out yet.
Emails can name them with {{available_team_members}} (first names, e.g. “Amy, Beth and Cara”) and {{available_team_member_count}}. Both are worked out when the email is sent.
Removing a member
Section titled “Removing a member”Click the bin icon next to a member and confirm Remove member. They lose access to the workspace straight away and are unassigned from all of their bookings. This can’t be undone: to bring them back, send a new invitation. The team lead can’t be removed. Removing a member without app access takes them off the team in the same way.
Travel from team members’ homes
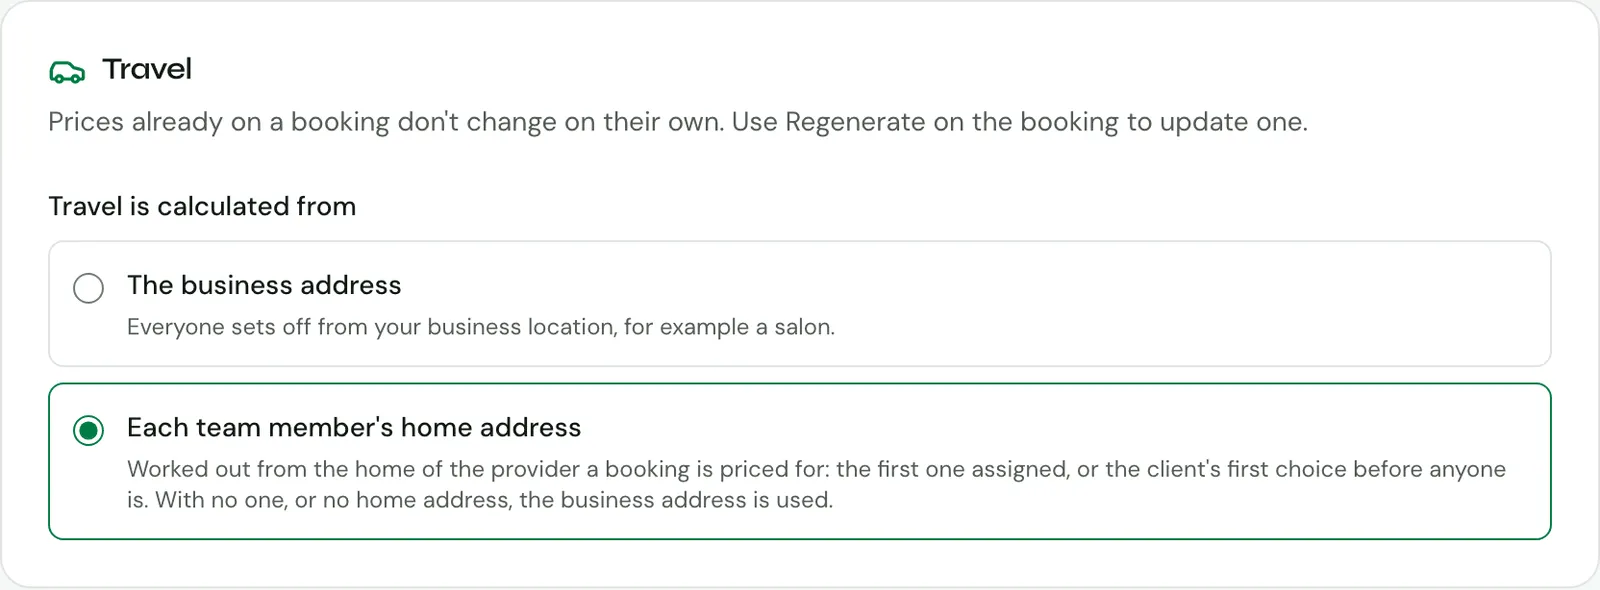
Section titled “Travel from team members’ homes”In a team workspace, the team lead chooses where travel is measured from. On Settings → Account → Team, set Travel is calculated from:
- The business address (the default): every booking’s travel time and travel price are worked out from the Business location in Profile & business, for example a salon everyone leaves from.
- Each team member’s home address: each team member on a booking travels from her own home (see below).
Home addresses
Section titled “Home addresses”- Team members add their own address on Settings → Account → Team, in the Your home address card.
- The team lead sets their own address, and anyone else’s, with the Home address button on each row of Team members.
- Type the address, or pick it from the places suggested as you type, which fills in the street and town. In the app, Save address waits until the address has been looked up, and Remove address asks first.
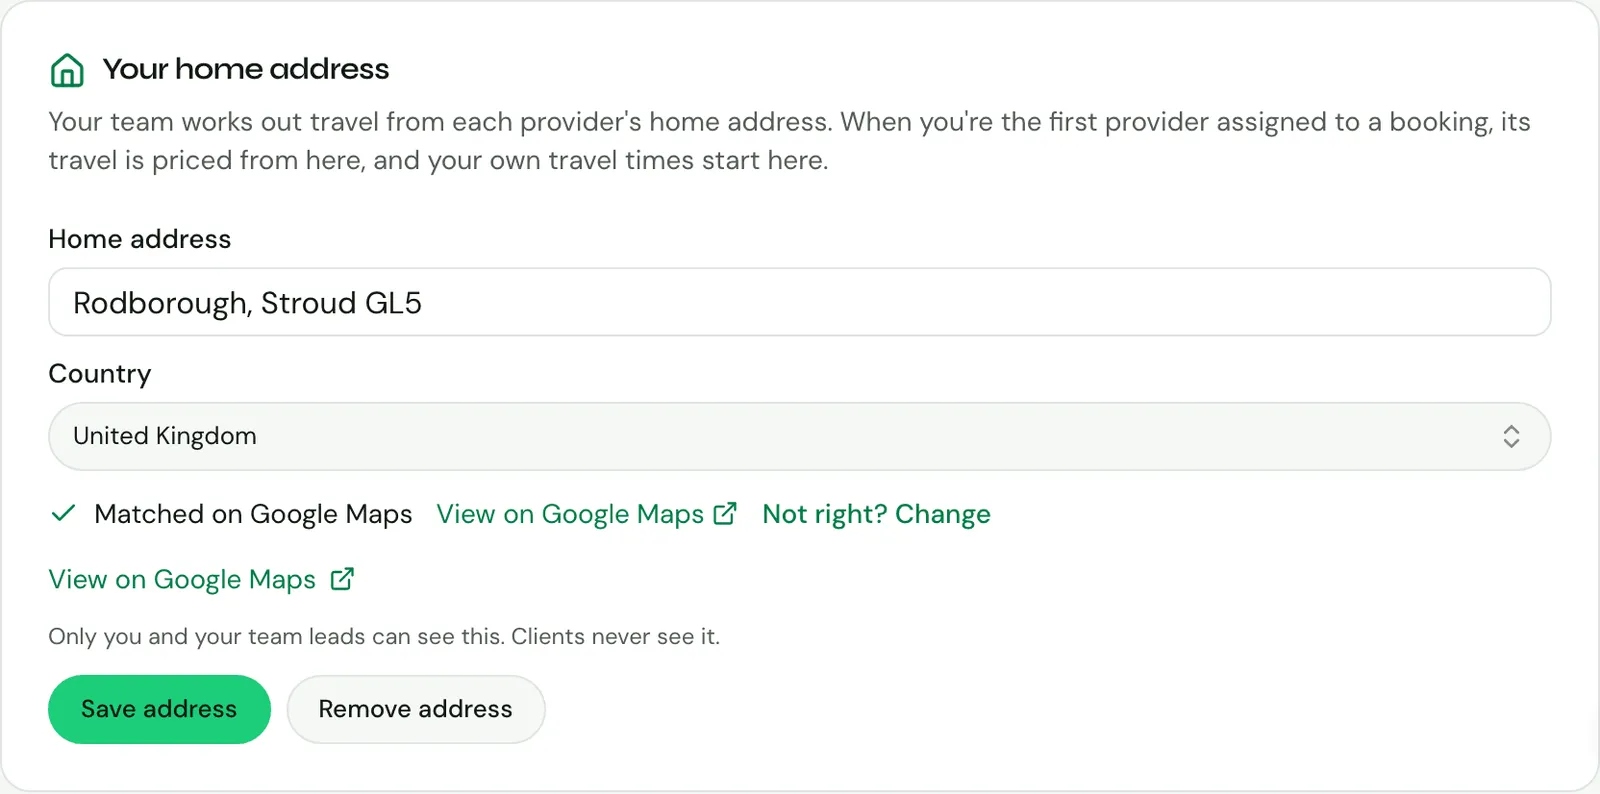
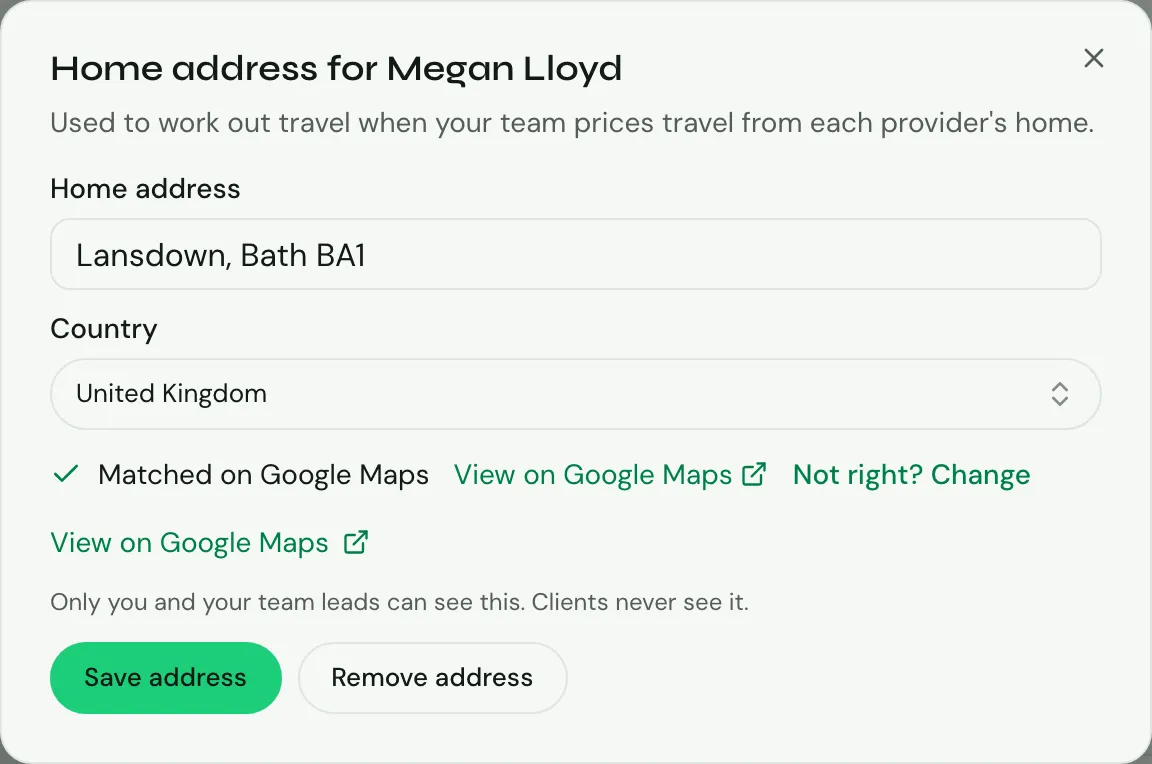
A home address is private: only that person and the team lead see it. Clients never see it, and the AI assistant can’t read it.
Whose home a booking is priced from
Section titled “Whose home a booking is priced from”With Each team member’s home address chosen:
- Two or more people on a booking each travel from their own home. Each person’s drive is worked out and added up: the travel lines say how many team members, for example “Mileage (2 team members)”, and never name anyone to the couple. Under the line, you see each person’s share, for example “Kristen 50 mi, Aleshea 46 mi”. A team member sees their own share and the line’s total, never broken down per colleague.
- Someone within your free distance adds nothing.
- Parking and tolls are charged once for each car.
- An overnight stay is charged only for someone whose own drive needs one.
- Someone whose home address isn’t matched on the map travels from the business address.
- A trial on another day is driven by the one person doing its services, from their home.
- Travelling together: on the booking’s Price card, turn on Team members travel together. Travel is then one journey, from the home of the person the booking is priced for (usually the first person assigned), or from the business address when nobody is assigned yet. The switch shows whenever two or more people travel, places nobody fills yet included. It’s off unless you turn it on, and anyone who can edit the booking can change it. An estimate that hasn’t been changed or agreed is recalculated at once; any other price says it may be out of date.
- Nobody, or too few, assigned yet: travel is priced for the team the wedding day needs, so it doesn’t go up once people are assigned. Each place nobody fills yet travels from the business address, as someone with no home address would. With nobody assigned, that’s the number the quote gives as Team members needed on the day: for example, 4 needed and a venue 28 miles from the business address is “Mileage (4 team members)”, 224 miles. With some people assigned, they travel from their own homes and each placeholder the day plan adds travels from the business address. Under the line, you see “4 not assigned yet 56 mi each” (or the names, then those not assigned yet). Travelling together is still one journey. A change to the party, days or times can change how many places the day needs: the price then says it may be out of date (who’s travelling has changed) rather than updating on its own, and Review update shows the new travel.
- With nobody assigned, the first place starts where the one journey always did: the home of the client’s 1st choice, when they picked exactly one 1st choice (see Preferred providers), else the business address. This is how enquiries from your enquiry form are priced.
- When someone is assigned, the price says it may be out of date. Review update puts their own journey in place of one from the business address.
- One person on the wedding: travel is from that person’s home.
If there’s no such person, or their home address isn’t matched on the map, the business address is used. Flights abroad, and rooms, are priced per person: before everyone is assigned, for the team the wedding day needs. Flights are from the airport of the person the booking is priced for. With The business address chosen, a booking has one journey, however many people are assigned or needed.
Prices don’t change when someone is assigned
Section titled “Prices don’t change when someone is assigned”Assigning a team member never changes a booking’s price by itself. Instead, the booking’s Price card says the price may be out of date, for example “Travel on this price was worked out from Priya Shah’s home. Recalculate the price to work it out from Chloe Bennett’s home.” (or “the business address” in place of a home), or “Who’s travelling, or how, has changed since travel was worked out. Recalculate to update it.” Click Review update to see the new price, then Apply new price. See Money.
Travel time on a booking
Section titled “Travel time on a booking”When travel is worked out from team members’ homes, a booking’s travel time says where it starts:
- From your home: you’re on the booking and your address is matched, so you see your own drive.
- From {name}’s home: the drive from that team member’s home.
- From the business address: no matched home address applies.
With two or more people on a booking, Travel Time lists each person’s drive, for example “Kristen · 1 hour 5 mins · 50 mi”, or “Together from Kristen’s home” when they travel together. A team member sees only their own. In the app, from its next version, the Day plan tab shows the same.
Each team member’s prices
Section titled “Each team member’s prices”When people on your team charge different prices (a senior and a junior provider, say), the team lead can set each person’s own prices. On a row of Team members, click Prices:
- Wedding and event bookings: their base price, and their price for each extra that depends on party size (such as per bridesmaid).
- Appointment services: their price for each service on your price list.
Leave a price empty to use your standard price. Percentage items (such as a service charge), fixed extras and travel rates are the same for everyone. Click Save prices. Setting prices needs the Team plan.
These prices are private: only that person and the team lead see them, and each person sees their own in the Your prices card. Clients only ever see a booking’s total, and the AI assistant can’t read them.
Whose prices a booking uses
Section titled “Whose prices a booking uses”Each booking is priced for one person, the same person whose home travel is worked out from:
- The team lead’s choice, made with Price for… (see below).
- Whoever created the booking, otherwise the first person assigned.
- With nobody assigned yet, the client’s 1st choice, when they picked exactly one 1st choice. This is how enquiries from your enquiry form are priced.
Otherwise your standard prices are used. The booking’s Price card says who it’s priced for, for example “Priced for Priya Shah”. Only the team lead and that person see this. Others on the booking see the total and travel, but not that person’s prices, and can’t change the price.
When the people assigned are on different tiers (or someone assigned isn’t in a tier), and the team lead hasn’t chosen with Price for…, each service is priced at the tier of the person doing it instead: hair at the hair stylist’s tier, makeup at the makeup artist’s. When two people on different tiers share a service, each person getting ready is priced at the tier of the team member doing her (see below). This uses tier prices only, never anyone’s own prices, and works the price out the same way as a quote for a team in different tiers (see When the people assigned are in different tiers). The Price card says “Priced at each team member’s tier”, and the team lead also sees who each service is priced for, for example “Hair Stylist · Kristen (Premier)” and “Makeup Artist · Aleshea (Essential)”. Travel is still worked out from the first person assigned.
On your enquiry form, an appointment service that people charge differently for shows a price range, for example “£45.00–£60.00”.
Changing whose prices apply
Section titled “Changing whose prices apply”As with travel, prices never change by themselves when someone is assigned. When a booking would now use someone else’s prices, the Price card says so, for example “This price uses the standard prices. Recalculate the price to use Priya Shah’s prices.” Click Review update to see the new price, then Apply new price.
A booking priced before the people on it were on different tiers says so too: “The people on this booking are on different tiers. Recalculate to price each person’s services at their own tier.” From the next version of the app, it shows the same message, and the same “Priced at each team member’s tier” on the booking’s Money tab.
The team lead can also click Price for… and choose Standard prices, anyone assigned, or, when the people assigned are on different tiers, Each person at their own tier. On a booking that’s no longer pending, you’re asked to confirm first, because the client may already have agreed the price.
Tiers group your team by price, for example Lead, Senior and Team member. Each tier has its own prices, and a quote can show the couple a price for each tier with someone free on their dates. They choose one when they accept.
Setting up tiers
Section titled “Setting up tiers”In Settings → Team, under Tiers, click Add a tier and give it a name and, if you like, a description (for example “Five or more years with us”). Couples see the name and description on their quote, beside the tier’s price. You can have up to six tiers, and the arrows change the order they’re shown in. Setting up tiers needs the Team plan.
Click Prices on a tier to set what it charges where it differs from your standard prices: the base price, extras that depend on party size, and appointment services. Leave a price empty to use the standard one. Unlike each person’s own prices, a tier’s prices are shown to couples.
Put each team member in a tier with the tier menu on their row. Their tier’s prices are their default; any prices of their own (see above) still come first. The Your prices card shows each person their tier. With only one tier, its prices are just what its members charge: couples are offered a choice from two tiers.
Removing a tier leaves its members with no tier. Bookings agreed at its prices keep their price, but anyone can then be assigned to them.
How a quote offers tiers
Section titled “How a quote offers tiers”Turn on Show a price for each tier on a Price breakdown block (see Showing the price line by line). When the page is sent, it shows the booking’s price at each tier that:
- has enough team members free on every day of the booking (see Who’s free), for the people each day needs (see How many team members a day needs), with someone who offers each service. On the wedding day that’s the number the quote shows (or the services’ counts added up, if fewer): once someone is assigned, it’s the people the day plan schedules, so one team member who does hair and makeup can be enough for a bride having both. A tier is also still offered when the team members free could do the services one each, as before;
- includes everyone already assigned to the booking.
When the people assigned are in different tiers, the quote shows one price instead (see When the people assigned are in different tiers).
Only your base price, party-size extras and services change between tiers. Anything you’ve typed over, your own lines, fixed extras, travel, fees, discounts and VAT carry over, worked out on each tier’s price.
The booking’s Money tab has a What the couple will be offered card with each tier’s price, and why a tier isn’t offered (for example “1 of 2 needed free on the dates”). When no tier can be offered, a page that offers tiers can’t be sent until you fix the reason or turn the setting off; a workflow step stops so you can retry it. The card and the send both say which reason it is:
- No one is in a tier yet: put your team members in tiers (see Setting up tiers), or turn the setting off.
- Everyone assigned is in one tier, and it’s short of people free: the message names the tier and how many of the people needed are free (or, when enough are free, that between them they don’t do the mix of services the booking needs). Free someone up, or turn the setting off.
- Nobody is assigned, and no tier has enough people free: free someone up, or turn the setting off.
A booking that’s already agreed shows its own price.
When the people assigned are in different tiers
Section titled “When the people assigned are in different tiers”If the people assigned aren’t all in one tier, or someone assigned isn’t in a tier, the quote can still be sent. The couple sees one price in the usual price block, with the deposit and payment schedule, and no choice of tiers. Each person’s service is priced at their own tier’s prices:
- The base price is the average over the places filled, one for each service each person does: someone doing both hair and makeup counts twice. For example, with a Senior on hair and an Artist on makeup, it’s halfway between the Senior and Artist base prices.
- A party-size extra for a service, such as bridal makeup or bridesmaid makeup, is priced person by person at the tier of the team member doing that person, exactly as Reassign team members on the booking’s Day plan shows it: the people you chose, and the people Knotless placed automatically (marked “auto”) alike. What you see on the Day plan is what you’re charged. With Mia (Senior, £60) doing two bridesmaids’ makeup and Rosa (Artist, £50) the other four, the price shows “Bridesmaid makeup 4 × £50” and “2 × £60” (£320). Change who does whom on the Day plan (a person’s team member, or the − and + counts) and the Price card says the price may be out of date (“Who does whom on the Day plan has changed since this price was worked out”); Recalculate and the price follows. A change of times that leaves someone with nobody does the same. When everyone on a service is in the same tier, it’s one line as before. An extra with no service is averaged over the places filled, like the base price.
- On the team lead’s Price card and in Recalculate, each of these lines says who it’s for, for example “Bridal party makeup 6 × £150 · Jenn” and “1 × £125 · Erika”, and “Bridal makeup £200 · Erika”. Who does whom is set on the Day plan under the lines opens Reassign team members. Team members don’t see a colleague’s name on a line, and the couple never sees names or tiers: their quote, invoices, portal and PDFs show the plain lines.
- Someone the Day plan gives to nobody (more people than team members on the booking, or no Day plan yet because the day has no times) is priced at the lowest tier among the people doing that service. The Price card and Recalculate say so, for example “2 people having makeup have no team member on the Day plan”, name them, and say whose tier they’re priced at; the team lead’s Assign them opens the Day plan. The Day plan chooses team members for the wedding day only, so a per-person extra on another day, such as a trial, is priced at the lowest tier on its service, and the notice says so. Someone chosen for a team member who has since been suspended stays at her tier, and her share of the pay stays hers. In the app, the Money tab shows the same names and notice from the next version; choosing who does whom is on the web.
- The price follows the people doing the work: a place nobody is assigned to yet is left out when someone is already doing that service. A service nobody is doing yet, and anyone assigned who isn’t in a tier, is priced at your standard prices. Sending the quote warns you which, for example “1 hair team member isn’t assigned yet, so their share of the quote is at your standard prices.”
- Anything you’ve typed over, your own lines, fixed extras, travel, fees, discounts and VAT carry over, as they do for a tier.
The What the couple will be offered card shows the price and, for you, who is assigned at which tier, for example “Makeup: Mia (Senior), Rosa (Artist)”. Team members see how many people are assigned, not who or at which tier.
When the couple accepts, that price is agreed and becomes the booking’s price (unless you changed the price after sending), so the deposit and invoices use it. No tier is recorded, so anyone can still be assigned. If the team changes afterwards, the price stays as agreed: the card, now called Team prices, warns you what changed, for example “Makeup: agreed at Senior and Artist, now Senior and standard prices”. To change the price, send the couple a change to their quote; once they accept it, it’s agreed with the team as it is then, and the warning goes.
Clicking Recalculate on the Price card works the booking out the same way, each service at the tier of the person doing it (see Whose prices a booking uses), unless the team lead chose someone’s prices or a tier. After the couple has agreed, the agreed price on the quote history doesn’t change.
When the couple chooses
Section titled “When the couple chooses”The couple picks a tier on their page, then accepts. The agreed price is that tier’s price, and the booking’s price becomes it, so the deposit and invoices use it. The Price card says “Priced at Senior tier”, and the quote history shows the tier.
Recalculating a booking agreed at a tier keeps that tier’s prices, whoever is assigned. The team lead can also price any event at a tier with Price for…, or choose a person or Standard prices to stop using the tier.
Assigning a booking agreed at a tier
Section titled “Assigning a booking agreed at a tier”Once a tier is agreed, assign someone from that tier. The Staffing card shows each person’s tier, and adding someone from another tier asks you to confirm first; the price stays the same. Workflows go further: Assign preferred provider, Ask preferred providers in turn, Check who’s free and the who’s-free fields only count that tier’s members.
Tiers on your enquiry form
Section titled “Tiers on your enquiry form”With two or more tiers, switch on Explain tiers on my enquiry form to show each tier’s name and description on your enquiry form, under Our team. No prices are shown there, and couples don’t choose on the form: they choose on their quote.